Bánh mì Inspired

8 Mar

This weeks reblog comes from The Incuistion. This Vietnamese version of my Mexican Tortas made of pickled radishes, tamarindo, red onion, fresh cucumber, cilantro, and basil looks so delicious that I may just go out and make it this weekend! The avocado aioli is inspiring and would be wonderful with some fish tacos as well! Be sure to trackback to her blog and check out some of her other recipes as well! What do you think?

The Incuisition

On my way home from the beach the other day, I was trying to figure out the prefect evening meal to finish a day dozing in the sand. I was in a daze, just having emerged from the long afternoon sun and from under the gauzy blanket of ocean sounds: the waves, muffled gossip from girls on a nearby blanket, scattered birds, and children with their cries and plastic shovels. I was craving something with real texture and strong spice. I wanted to carry over the feeling of Pacific breeze, warmth and ease into the evening. I kept thinking about the flavors of tamarind, soy, cilantro, and sesame. When I got home, I did something I rarely do: make a sandwich.

View original post 501 more words

Turkey Chili and Savory Chipotle-Jack Scones

6 Mar Spicy Turkey Chili

This week we had the first snowstorm of the year in New England! Yes, you read that correctly, here it is the beginning of March and we have only had ONE real snowstorm this year. In fact, my little town of Berwick, received about 14 inches of the white stuff. It snowed continuously for almost 2 days. We then had cold rain and sleet to follow it up. I can tell you that I did not miss it one little bit. If global warming means that New England will have warmer winter weather and less snow, then I am all for it!

All that cold and wet weather made for a perfect time to cook up a batch of some energy packed Turkey Chili. My turkey chili is made with lean ground turkey breast. The other thing that I love from my recipe is that once you prep all the ingredients, you can be sitting down to eat in 40 minutes. This chili requires none of the long stewing that some meat based recipes require.

Turkey Chili

Turkey Chili

When I usually make this chili, I setup a mise en place and then commence with the cooking. I found that this gives me complete focus on the cooking, rather than having to worry about cooking AND prepping at the same time. This recipe also has an added bonus of using beer, so feel free to consume while you are cooking!

I accompanied the chili with a savory scone recipe that I wanted to test out. I absolutely cannot eat chili without bread, or cornbread, or some other type of chili-sopping food item. This time I wanted to do something a bit different, so what could be more different than a savory scone? The first flavor combination that popped into my head was chipotle and cheese. So I went about researching recipes for various types of scones, I settled upon a lighter version from Cooking Light. The only variation that I made was that I added bit more chipotle and used monterry jack cheese instead of cheddar.

Chipotle Jack Scones

Chipotle Jack Scones

Grab a Corona, serve yourself up a bowl of turkey chili, grab a chipotle-jack scone, and enjoy!

So what are your traditional recipes for Chili? What would you suggest to make this recipe even better?


Turkey Chili

  • 1 pkg (1.3 lbs)  Ground Turkey Breast
  • 2 ½  tblsp Chili Powder
  • 1 tsp oregano
  • ½ tsp thyme
  • 1 tsp salt
  • 1 tsp black pepper
  • ¼ tsp cayenne pepper
  • ½ tsp smoked paprika
  • ½ tsp dried epazote
  • 1 28oz. can of whole peeled tomatoes
  • 3 chiles poblano
  • 1 can of black beans
  • 1 can of pinto beans
  • 1 can white hominy (pozole)
  • 1 yellow onion (for this recipe I used a vidalia)
  • 2 cloves garlic
  • 2 chipotles in adodo
  • 1 tblsp. sauce from the adobo can
  • 2 tblsp olive oil
  • About 1 cup of beer
  • About 1 cup of water

Mise en place all the ingredients:

  • Chop the onions and mince the garlic and place in a small bowl.
  • Combine the chili powder, oregano, thyme, salt, pepper, cayenne pepper, and paprika in another bowl.
  • Roast, peel, seed, and devine the chili poblanos, chop and place in another small bowl.
  • Remove the seeds from the chipotles and place with the adobo sauce in another small bowl.
  • Rinse the beans well and place together in a small bowl together with the epazote.
  • Rinse the hominy, then remove the seeds from each kernel, place in a small bowl.
  • In a large bowl, take the tomatoes and crush through your fingers to make a nice pulp.

Now that you have all the ingredients ready, we can start to cook!

  1. Heat the olive oil in a stockpot over medium-high heat
  2. When the oil is hot, but not smoking, add the onion and garlic with a pinch of salt and cook until the onion is translucent, about 5 minutes.
  3. Add the ground turkey and with your mixing spoon, break the ground turkey up really well.
  4. Once you have broken it up, add the bowl with the spices. Mix well to combine and cook for about 2-3 minutes.
  5. Add the beer and continue to cook until the ground turkey mixture is reduced to more than half, about 8 minutes
  6. Now add the chili poblano and mix well to combine.
  7. Next add the tomatoes. Once it comes back to a boil, reduce heat to medium and cook for about 20 minutes, stirring regularly.
  8. After 20 minutes, add the beans with the epazote and mix well to combine.
  9. Add the hominy, again, mix well to combine.
  10. At this point you can add the 1 cup of water if you desire a more soupy consistency.
  11. Simmer for another 20 minutes on medium-low heat.
  12. Serve with those delicious chipotle-jack scones and some more beer!

    Spicy Turkey Chili

    Spicy Turkey Chili

Chipotle-Jack Scones

  • 2 cups all-purpose flour
  • 1 tbsp. baking powder
  • 1/2 tsp. salt
  • 3 tbsp cold butter, cut into chunks
  • 3/4 cup low-fat sour cream
  • 1/2 cup shredded monterry jack cheese
  • 1 tbsp. water
  • 2 tbsp. chopped chipotles in adobo (about 3 large chipotles)
  • 1 egg, lightly beaten
  1. Preheat your oven to 350F.
  2. Combine the flour, baking powder, salt and butter in a large mixing bowl and mix with a pastry blender until well combined and crumbly.
  3. Add the rest of the ingredients and mix well with a wooden spoon (I used some damp hands!) until the dough is well formed and just a tad sticky.
  4. Lightly grease a cookie sheet with some cooking spray and divide the dough in two halves and place on the baking sheet.
  5. Form each ball of dough into a circle just about 1/2 inch to 3/4 inch thick.
  6. Then with a sharp knife or a pastry knife, divide into 6 triangles by cutting each circle in half, then making an “X”.
  7. Place some parchment paper a spread the triangles out on the tray about 1 inch or more apart as they will rise during baking.
  8. Bake in the oven for about 20 minutes, halfway through I rotated the sheets in the oven to ensure even baking.

    Chipotle Jack Scones

    Chipotle Jack Scones

Mussels and Almandes de Mer

1 Mar

This weeks reblog comes from a great food blog Cooking in Sens. I love mussels and searched for a recipe to reblog and share with all of you. Mussels are so simple to prepare but oh so elegant to serve. This recipe is no exception, a few fresh ingredients (you can use littleneck clams instead) and such a stunning result! Enjoy!

Baja Fish Tacos

27 Feb Baja Fish Tacos


Back in my days in the U.S. Marines, when I was stationed in Southern California, I used to take weekend trips with some friends down to Rosarito Beach, Mexico. Among all the wonderful things that Rosarito Beach had to offer, one of my first stops was to this little taco stand across from the hotel we always stayed at. Although I do not remember the name of the place anymore, I certainly do remember the flavors! The fish tacos were unlike any I have ever tasted, fried in a rich batter, served with fresh, handmade, corn tortillas, cabbage, salsa, and a delicious mayonnaise, served with a ice cold Pacifico clara! To me, this was the ultimate weekend getaway!

Baja Fish Tacos

These flavors were all but forgotten until I watched an episode of Rick Bayless’s outstanding series, Mexico: One Plate at A Time. There he was making what sounded like the same fish tacos I had fell in love with all those years ago! I instantly placed a sticky note in my head to test out this recipe and share the recipe with you!

I made a few modifications to his recipe for my tastes, but if you want the exact recipe, you can find it at his website under Classic Ensenada Fish Tacos. I left out the baking powder, as I found that the batter became very “puffy” while frying and I added some lime zest to bring a bit of citrus flavor to the beer batter. You can experiment with different types of beers also, a deep amber beer will give this batter a great nutty flavor, almost any type of beer will work, but I would avoid using a wheat beer, as it tends to alter the consistency of the batter.  You will also find that my salsa is different than his, I am using a classic salsa recipe that I learned from my wife. Finally, I use a chipotle sauce rather than a plain jane mayonnaise based sauce. I just like the smokiness of chipotle with the citrus flavors of the fish. None of these modifications are to say that I know better than Rick Bayless, I just wanted to add a bit of my own flavors to his great recipe!

Baja Fish Tacos

One of the best things about testing out a recipe is getting to eat the finished product. I cracked open a cold bottle of Corona and took a bite of my fish taco. I closed my eyes and was instantly transported back to that little roadside taco stand in Rosarito Beach…


 Baja Fish Tacos

(Adapted from Rick Bayless’s Ensenada Fish Tacos )

  • 1 pound boneless, skinless fish fillets (I like halibut or cod, but you can use just about anything)
  • 1 tablespoon yellow mustard
  • 1/2 teaspoon Mexican oregano
  • 1/2 teaspoon fresh black pepper
  • 1 teaspoon chicken-flavor powdered bouillon (I use Knorr)
  • 1 cup beer
  • 1 cup all-purpose flour
  • 2 garlic cloves
  • Lime zest
  • Salt
  • Vegetable oil to a depth of 1 1/2 inches for frying

Garnishes:

  • ½ head savoy cabbage, thinly sliced
  • Salsa de Chile Arbol (see below)
  • Chipotle Sauce (see below)
  • Lime wedges
  1. Finely mince the garlic, sprinkle generously with salt, then mash back and forth with the side of a knife across a cutting board until it makes a paste.
  2. Put the garlic paste into a medium bowl and add the oregano, black pepper, mustard, bouillon, beer, lime zest and 1/2 teaspoon salt.
  3. Add the flour to the wet ingredients and whisk just until combined.
  4. Heat the oil in a heavy skillet or dutch oven to 370 degrees.
  5. Cut the fish into pieces about 3 inches long by 1/2 inch square
  6. Take a piece and dip it completely into the batter, then lay it gently in the oil.Keep going with a few more pieces (4 at a time). Fry, turning regularly, until they are a deep golden brown and crisp, about 4 minutes.
  7. Drain on a paper towel and then place in a warm oven on a wire rack over a sheet pan while the rest of the fish are frying.
  8. Set out with cabbage, salsa, warm corn tortillas, limes and the crispy fish for everyone to make tacos.

    Baja Fish Tacos


Salsa de Chile Arbol

  • 1 clove garlic
  • 1 peel of onion
  • 1/4 cup cilantro leaves, loosely packed
  • 1/2 ounce (15-20) dried arbol chiles
  • 1 roma tomato
  • 1/2 teaspoon salt 
  1. In a small saucepan, bring about 1 1/2 cups of water to a boil.
  2. Remove the stems and caps from the chiles.
  3. In an ungreased skillet over medium heat, toast the chiles, toss constantly to avoid burning, until the chiles fill the kitchen with their toasty aroma, about 1 1/2 minutes.
  4. Once the chiles are toasted, put them in the boiling water with the tomato and boil for about 5 minutes.
  5. Drain well and place in a blender or a food processor with the garlic,onion, and cilantro. Pulse until nearly smooth.
  6. Add the salt.

    Chile de Arbol

    Chile de Arbol


Chipotle Sauce

  • 1/3 cup Chipotle Mayo
  • 1/3 cup sour cream
  • 1/3 cup milk
  1. Whisk all ingredients together until you make a smooth sauce.


Chipotle Mayonaise

  • ¼ cup grapeseed oil
  • ¼ cup olive oil
  • 1 egg yolk
  • ½ tablespoon lemon juice
  • ½ tablespoon water
  • ½  tablespoon chipotle chile powder
  • 1/8 of a teaspoon salt
  1. Using an immersion blender in a deep cup (I use a Pyrex 4 cup measuring cup), blend the yolk, liquid, chile powder, and salt.
  2. While still blending, start incorporating  the oil mixture a bit at a time (What I do is put the oil in a squeeze bottle).
  3. Once all the oil is incorporated, you will have a nice, thick, mayo.

    Baja Fish Tacos

    Baja Fish Tacos

Spicy Haddock Fish Cakes with Aioli

23 Feb

This weeks reblog is a delicious dish from The Bite House. Those of us who are Catholic really appreciate a great lenten dish like this!

The Bite House

Fish cakes, crab cakes, both remind me of beach vacations. Seashore restaurants, seafood take-outs, cold beer, tartar sauce, sun. It’s not summer yet, and I know that back-painfully well; after shoveling the snow from our driveway yesterday, the car still got stuck, and later on we stacked a cord of firewood. But guess what I felt like eating in spite of all the ice and snow? Hint: check the title of this post. I wanted summery fish cakes; classic ones made with mashed potatoes. Crab cakes tend to be more popular in general, but fish cakes, when done correctly, are just as tasty and rewarding. They’re also cheaper to make! Now I’ve got everyone’s attention.

View original post 391 more words

Tlacoyos de Frijol

20 Feb Blue Corn Tlacoyos
Blue Corn Tlacoyo

Blue Corn Tlacoyo with nopales, salsa roja, and queso fresco

One of the things that I love about Mexico is the open air markets that pop up across neighborhoods throughout the city each day. These bazaars are called Tianguis. In my suegras (mother-in-law)neighborhood, Tianguis is usually on Sundays and Wednesdays, but you do not have to travel very far to find another local Tianguis on any given day. For me, I just love wandering through these markets, especially once I get to the section that is selling food. One memory that I have is going to a Tianguis with my suegra and I stopping by this stall with a little old lady and her large comal, a pot of refried beans, and a large bowl of fresh corn masa. My suegra put up three fingers and the little old lady took a ball of masa, formed a thick tortilla in her hands, stuffed it with beans, and flipped it back and forth between her two hands. Once she has formed a large, mostly flat, football shaped cake, she slapped it on the hot comal. A few minutes later, I had this delicious toasted treat called a Tlacoyo.
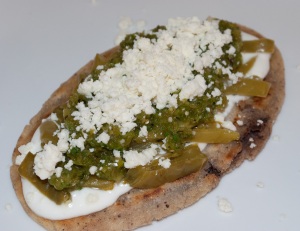
Yellow corn Tlacoyo

Yellow corn Tlacoyo topped with sour cream, nopales, salsa verde, and queso fresco

Tlacoyos are a simple, but delicious antojito that are oval shaped fried or toasted cakes made of masa. They are similar to fresh corn tortillas, but are somewhat torpedo or football shaped and fatter. They are usually stuffed with refried beans, requeson, fava beans, or chicharon (pork rinds) or other ingredients. The toasted or fried Tlacoyo is traditionally consumed with only salsa and cheese. We usually just pile on some fresh sautéed nopales, salsa, and cheese, but you can experiment with all sorts of toppings here. Start with some shredded chicken or chorizo and don’t stop until you have topped it with some fresh queso canasta or queso cotija!

Forming your Tlacoyo takes a bit of skill and a LOT of practice. As I made them, I had a few failures, but by the end, we had made a few perfect Tlacoyos to shoot and eat! Maybe someday in the future I will shoot my own videos, but until then, you can view a YouTube video on how to make Tlacoyos here : How to make Tlacoyos.

Duo de Tlacoyo

Duo de Tlacoyo

Tlacoyos de Frijol

  • Frijoles de Olla
  • Salsa Roja or Salsa Verde (see below)
  • Sauteed Nopales (see below)
  • Queso Fresco or Queso Cotija
  • 2 cups Blue Corn Masa Harina or Maseca Masa Harina
  • Water

1. In a large mixing bowl dump in the masa harina and make a well in the center.

2. Start adding water with about 1/2 cup at first then mix in the masa just as you would to make fresh pasta dough.

3. Continue to add water at little bit at a time until you form one cohesive mass of dough, it should be a little bit on the wet, tacky side.

4. At this point you can follow the YouTube video or you can follow my method (warning: this takes a bit of practice to perfect and it is difficult to write a procedure!) Take a little larger than a golf ball size bit of masa and form an oblong mass, take it to a tortilla press and LIGHTLY press out a rather thick tortilla.

5. Take the thick tortilla and spread some beans down just the center of the tortilla. Then fold one side halfway in and then the other side halfway in, then fold down the top and bottom to cover the beans completely.

6. Take it back to the tortilla press and press it out lightly to form a long torpedo shaped, or football shaped thick tlacoyo.

7. Place it gently on your heated comal and toast well on both sides.

9. Once you have all your tlacoyos toasted, spead a bit of corn oil on both sides of the tlacoyo with your finger or a brush, then fry until crisp and golden.

10. Take your tlacoyo, spread some fresh sautéed nopales, put a liberal spoonful of salsa on top of the nopales, then add some crumbled cheese and serve!

Fresh Sauteed Nopales


  • 6-8 Nopales (Cactus Paddles)
  • 1 teaspoon dried oregano
  • 1 tablespoon corn oil
  • Pinch of Salt  

1. Clean the nopales by cutting off the needles and the nodes, and then cut the stem and the edges off the paddles.

2.  Cut each nopal into thin strips about 1 inch long in length.

3. Once they are all cleaned and cut, place in a pot of boiling water and boil for about 5 minutes or until tender.

4. Rinse under cold water.

5. Take a medium sautee pan and about a tablespoon of corn oil and heat until shimmering.

6. Add the nopales and sautee for about 2 minutes.

7. Add the oregano and salt and toss well. Continue to cook for about 1 or 2 more minutes.

8. Serve!


Salsa Verde 

  • 3 Tomatillos
  • 6 chile jalepeño
  • 1 clove garlic
  • 1 peel of onion
  • 1/4 cup cilantro loosely packed
  • Salt to taste

1. Toast the tomatillos, jalepeño, and garlic on a comal.

2. Once they are all nice a toasted (but not burnt!), halve the tomatillos, peel the garlic, and remove the stems from the jalepeño. You can also remove the seeds and veins from the jalepeño for a slightly milder salsa.

3. Place in a food processor with the onion and the cilantro.

4. Pulse until you get the consistency you desire, less for a chunky salsa, more for a smoother salsa.

5. Spoon into a serving bowl, add the salt, and mix well.

Blue Corn Tlacoyos

Blue Corn Tlacoyos with beans, nopales, salsa roja, and cheese


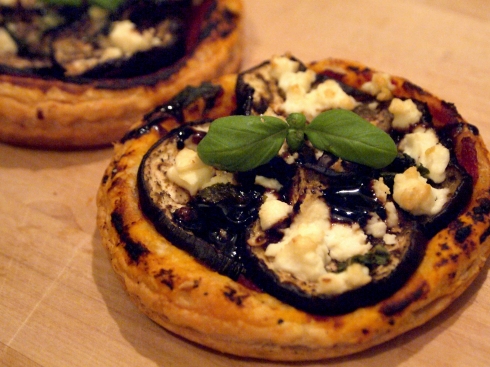
Aubergine and Feta Tarts with a Tamarind Drizzle

16 Feb

Every week I repost on my blog the best recipes (chosen by yours truly) from the blogs that I follow. This is a wonderful recipe from Vered at Eat Now Talk Later. It is a brilliant starter or tapas that uses the unique flavor of tamarindo. I know I will be trying this recipe very soon!

Eat Now Talk Later

Even though tamarind is usually used in asian cooking, I’ve used it here in a Mediterranean style tart. I really like the sweet and  tangy flavour and thought it would be perfect with cheese. I love all these ingredients separately but I’ve never used them together before.

As you may already know I love puff pastry for being delicious, easy to use, and amazingly versatile. It’s works so well with Mediterranean ingredients and especially cheese. I have previously posted a recipe for Mozzarella and Pesto tarts on puff pastry.

This is a simple recipe that makes a perfect starter or light lunch. Serve with a salad and some sliced meats.

Aubergine and Feta Tarts with a Tamarind Drizzle

Start to finish time: 45 minutes
Serves: 2

Ingredients

150g ready rolled puff pastry
1 aubergine, sliced about 5 mm thick
1 tbsp olive oil
4 tbsp tomato puree
4 tsp  garlic oil
100g feta cheese

View original post 269 more words

Chocolate and Chile Ancho Bread

13 Feb Chocolate and Chile Ancho Bread with Fresh Raspberry Preserves

With Valentines Day just a day away, forget about buying chocolates for your significant other! Make something for them!!! This weeks inspiration comes from a deep, dark part of my heart. My chocolate heart that is!

My mother bought me a book for my birthday, Artisan Bread in Five Minutes a Day by Jeff Hertzberg and Zoe Francois, and leafing through the pages my eyes immediately locked upon a recipe for chocolate bread.  As I began to read the details about making this bread, I could not help but think what an addition chile would be to this recipe! Chocolate and chiles are such a flavor affinity to me! So, once the weekend came, it was time to itch my baking scratch! You will notice the recipe is by volume rather than by weight. This is a bit inconsistent in my opinion, but I did not take the time to convert and test the recipe by weight. I was too anxious to eat this creation!

Chocolate and Chile Ancho Bread

Chocolate and Chile Ancho Bread

The instructions called to place the yeast, water, honey, and salt in a container first, then add the dry ingredients. Having a little bit of bread making under my belt by now, I decided to alter this and I proofed the yeast in about a ½ cup of warm water (about  105°F) with a teaspoon of honey. While the yeast was activating, I set to making the ganache. I used a double boiler and combined the butter and the chocolate. Once the chocolate and butter were completely melted, I added the ancho chile powder and the cayenne pepper and whisked to incorporate. I set the ganache aside to cool a bit. Once it was cool, I then mixed all the wet ingredients together, added them to the dry ingredients and I mixed this in my Kitchen Aid mixer for about 2 minutes. I let the dough rest, covered, for about 20 minutes, and finally added the salt and mixed again for about 2 more minutes (autolyse!). I then let the dough proof for about 2 hours. After the initial proof, the dough is ready to be formed, so I divided it in 2 equal portions of approximately 1.5 lbs. each and formed each into a boule. You will notice that this dough is quite sitcky and difficult to work with, I believe that this is due to the fact that the dough is made to be used over the course of a week, from your refrigerator (which makes it easier to handle). In order to form this dough correctly, use a liberal amount of flour on your work surface and dust the dough with a good handful of flour as your forming your boule. Let the boules rise once again for about 1 hour, then pop them in your oven for about 30 minutes. While the bread is in the oven, you can set about making the preserves!

Chocolate and Chile Ancho Bread

Fresh from the oven!

The raspberry preserves are an astonishingly simple and delicious addition to this bread. Simply bring your raspberries to a quick boil for about 1 minute, mash them up with a potato masher, then add your sugar. These preserves require no pectin whatsoever. I like this recipe because using pectin requires adding more sugar, which dilutes the natural flavor of the fruit. The raspberries have enough natural pectin to do the trick. Just continue to cook the raspberries for about 5 minutes, stirring almost constantly. Then just ladle the mixture into your prepared canning jars. As the mixture cools it will form that gel that you are looking for.

Take the chocolate bread and spread a nice size dollop of raspberry jelly on a slice. I just love the deep bittersweet flavor of the chocolate and the subtle notes of sweetness in the honey, then the biting finish of the chile. The sweet raspberry preserves are a wonderful counterpoint to the bittersweet chocolate. Forget heaven, chocolate and chiles are a match made for my kitchen!

Chocolate and Chile Ancho Bread

( Adapted from The Artisan Bread in Five Minutes a Day )

  • 4 ounces bittersweet chocolate (I used Ghirardelli 60% Cacao)
  • 1 tablespoon Ancho Chile powder
  • 1/8 teaspoon Cayenne Pepper
  • ½ cup unsalted butter (1 stick)
  • 1 ¾ cup lukewarm water (100°-105°F)
  • 1 ½ tablespoons active dry yeast
  • 1 ½ tablespoons kosher salt
  • 4 large eggs, lightly beaten
  • 1 large egg for the egg wash
  • 2/3 cup honey
  • 5 ½ cups unbleached all-purpose flour
  • 1 cup unsweetened cocoa powder (I used Ghirardelli )
  • 5 ounces finely chopped bittersweet chocolate (Ghirardelli 60% Cacao)
  1. Proof the yeast by taking it and mixing it with about ½ cup of the warm water and 1 teaspoon of the honey in a cup or a bowl. Allow it to sit in a warm place. Once it doubles in volume it is ready to use.
  2. While the yeast is proofing, make the ganache by melting the butter and the 4 ounces of chocolate in a double boiler. Once they are melted , add the chile powder and the cayenne pepper mixture and blend well with a whisk. Set aside to cool.
  3. Take the 5 ounces of chocolate and pulse until finely chopped in a food processor.
  4. Mix the proofed yeast, the rest of the water, and the honey with the eggs in your mixing bowl.
  5. Add the flour, the chopped chocolate, the ganache, and the cocoa powder and mix for 2 minutes using the dough hook attachment.
  6. Cover and allow to rest for 20 minutes.
  7. After 20 minutes, add the salt and mix once again for 2 minutes using the dough hook.

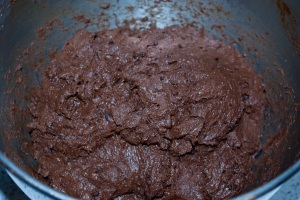
    Chocolate and Chile Ancho Dough

    Prior to the 2 hour proof.

  8. Cover and allow to proof for about 2 hours.
  9. Dust your work surface liberally with flour then take the dough from the mixing bowl. Dust dough liberally with flour and divide into 2 1 ½ lb. portions.
  10. Work each into a boule by stretching the surface of the dough around to the bottom, turning the dough in quarter turns as you go.
  11. Place on parchment paper and let the boules rise for 1 hour.

    Chocolate and Chile Ancho Boule

    A formed boule rising once again!

  12. Preheat your oven with the baking tiles or baking stones to 350F. Allow a minimum of 30 miuntes for the tiles to come to temperature.
  13. Simply take one egg and whisk it and then brush the surface of each boule with the egg wash.
  14. Slash the boules in a cross pattern, a tic-tac-toe pattern, or 3 vertical slashes.
  15. Bake the boules in the oven for about 15 minutes, then rotate to ensure even baking.
  16. Bake for a final 15-20 minutes.
  17. Allow to cool completely on a wire rack. You can try and dust the boule with some powdered sugar if you want. I tried it on one boule!
Chocolate and Chile Ancho Bread

Dusted with some DelGrosso dust

Fresh Raspberry Preserves

  • 4 cups raspberries
  • 4 cups sugar
  1. Bring the raspberries to a hard boil in a saucepan over medium-high heat. Boil for 1 minute
  2. Add the sugar and bring to a boil once again.
  3. Cook for 5 minutes, stirring almost constantly.
  4. Remove from heat and ladle into prepared canning jars or if you plan on using it right away, just some airtight sterilized glass containers!

    Chocolate and Chile Ancho Bread with Fresh Raspberry Preserves

    Chocolate and Chile Ancho Bread with Fresh Raspberry Preserves

Mole de Olla

10 Feb Molle de Olla

Although this has been a very mild winter in the Northeast, Winter still has New England firmly in its grasp. I cannot think of a better way to warm one’s soul than some delicious, comforting, beef stew. Not just your average, everyday beef stew, but an authentic Mexican stew made in a broth of chile pasilla that originates from the state of Oaxaca. Mole de Olla!

Mole de Olla

Mole de Olla

This is a recipe that my wife taught me when we first married and I have used ever since. This recipe has a unique ingredient that many of you may not have heard of. It is called Epazote. Epazote is a herb used in many dishes in Mexico. It adds a unique flavor to dishes, but its best quality is its ability to control  intestinal gas! In Mexico, they use fresh epazote branches in Mole de Olla, but since we do not have any here, I have to use dried epazote. A good rule of thumb is to use 1 teaspoon of dried epazote for each fresh branch of epazote. You can source dried epazote here!

Mole de Olla is rather simple to prepare. The only thing to be mindful of is the order that you cook the vegetables in, which will ensure they are all the proper tenderness at the same time. We start by slowly simmering the beef short ribs and the beef. My recipe uses short ribs as well because I like the added flavor that the beef bones bring to the stock. Just be sure to de-bone the beef after it is cooked! After the beef is pretty much done, we start adding the vegetables. First we add the corn and potatoes, then the beans and the carrots. We add the chile pasilla puree, simmer until all the vegetables are the desired tenderness, serve in large bowls with fresh limes and fresh corn tortillas and maybe a delicious Malbec! 

Mole de Olla

  • 1 lb beef short ribs
  • 1 lb lean beef, cut into small chunks
  • 1 bay leaf
  • 10-12 cilantro stems, tied with butchers twine
  • 2 teaspoons dried epazote
  • 2 corn cobs
  • ½ white onion
  • 1/2 head of garlic
  • 1/2 lb. green beans
  • 6 medium red potatoes, quartered
  • 2 large carrots sliced quarters
  • 5 chiles pasillas
  • salt to taste
  1. Cook the all the beef in about 3 quarts of water, along the onion, the garlic, salt, bay leaf, and cilantro stems on low heat for 30 minutes.
  2. Cut the corn cobs into 1 inch slices, wash the potatoes and quarter them. Slice each of the green beans in half, then quarter the carrots.
  3. Once the meat is cooked, add the corn and potatoes.
  4. About five minutes later, add the carrots, the beans, and the epazote.
  5. While this is all simmering away, toast the chiles on a comal, then soak them in water for about 20 minutes.
  6. Remove the seeds and veins, then add the chiles to the blender with about ½ cup of the stock, a slice of white onion, and a clove of garlic.
  7. Blend this to a nice puree, then strain into the pot through a medium mesh sieve.
  8. Simmer until all the vegetables are tender, about another 30 minutes.
  9. Remove the beef short ribs and de-bone the beef and put the beef back into the pot.
  10. Serve in large bowls with lime slices and fresh corn tortillas!

    Mole de Olla

    Mole de Olla

Braised Goat with Squash and Red Wine – From Chica Andaluza

9 Feb

This recipe is for those of you who love cabrito (goat). I for one, will definitely add this to my recipe book!

Chica Andaluza

Finally we have had a small drop in temperatures and it looks as though rain may well be a real possibility in the next few days.  Me, a Chica who hates the cold and damp, breathing a sigh of relief at the thought of rain which is so badly needed for the olives, the fruit trees, the rivers.  What a long way I have come on my Andalucían journey!

Winter weather means warming winter food.  After having friends over recently, I was left with half a kilo of chopped goat which had not been cooked so I froze it for a rainy day. That rainy day came round and to make a change from the simple local way of cooking it with garlic, chilli, bay leaves, peppercorns and white wine I decided to make a stove top casserole.

We are still being supplied with squash by Big Man´s cousin…

View original post 334 more words