Tag Archives: Bread

Chocolate and Chile Ancho Bread

13 Feb Chocolate and Chile Ancho Bread with Fresh Raspberry Preserves

With Valentines Day just a day away, forget about buying chocolates for your significant other! Make something for them!!! This weeks inspiration comes from a deep, dark part of my heart. My chocolate heart that is!

My mother bought me a book for my birthday, Artisan Bread in Five Minutes a Day by Jeff Hertzberg and Zoe Francois, and leafing through the pages my eyes immediately locked upon a recipe for chocolate bread.  As I began to read the details about making this bread, I could not help but think what an addition chile would be to this recipe! Chocolate and chiles are such a flavor affinity to me! So, once the weekend came, it was time to itch my baking scratch! You will notice the recipe is by volume rather than by weight. This is a bit inconsistent in my opinion, but I did not take the time to convert and test the recipe by weight. I was too anxious to eat this creation!

Chocolate and Chile Ancho Bread

Chocolate and Chile Ancho Bread

The instructions called to place the yeast, water, honey, and salt in a container first, then add the dry ingredients. Having a little bit of bread making under my belt by now, I decided to alter this and I proofed the yeast in about a ½ cup of warm water (about  105°F) with a teaspoon of honey. While the yeast was activating, I set to making the ganache. I used a double boiler and combined the butter and the chocolate. Once the chocolate and butter were completely melted, I added the ancho chile powder and the cayenne pepper and whisked to incorporate. I set the ganache aside to cool a bit. Once it was cool, I then mixed all the wet ingredients together, added them to the dry ingredients and I mixed this in my Kitchen Aid mixer for about 2 minutes. I let the dough rest, covered, for about 20 minutes, and finally added the salt and mixed again for about 2 more minutes (autolyse!). I then let the dough proof for about 2 hours. After the initial proof, the dough is ready to be formed, so I divided it in 2 equal portions of approximately 1.5 lbs. each and formed each into a boule. You will notice that this dough is quite sitcky and difficult to work with, I believe that this is due to the fact that the dough is made to be used over the course of a week, from your refrigerator (which makes it easier to handle). In order to form this dough correctly, use a liberal amount of flour on your work surface and dust the dough with a good handful of flour as your forming your boule. Let the boules rise once again for about 1 hour, then pop them in your oven for about 30 minutes. While the bread is in the oven, you can set about making the preserves!

Chocolate and Chile Ancho Bread

Fresh from the oven!

The raspberry preserves are an astonishingly simple and delicious addition to this bread. Simply bring your raspberries to a quick boil for about 1 minute, mash them up with a potato masher, then add your sugar. These preserves require no pectin whatsoever. I like this recipe because using pectin requires adding more sugar, which dilutes the natural flavor of the fruit. The raspberries have enough natural pectin to do the trick. Just continue to cook the raspberries for about 5 minutes, stirring almost constantly. Then just ladle the mixture into your prepared canning jars. As the mixture cools it will form that gel that you are looking for.

Take the chocolate bread and spread a nice size dollop of raspberry jelly on a slice. I just love the deep bittersweet flavor of the chocolate and the subtle notes of sweetness in the honey, then the biting finish of the chile. The sweet raspberry preserves are a wonderful counterpoint to the bittersweet chocolate. Forget heaven, chocolate and chiles are a match made for my kitchen!

Chocolate and Chile Ancho Bread

( Adapted from The Artisan Bread in Five Minutes a Day )

  • 4 ounces bittersweet chocolate (I used Ghirardelli 60% Cacao)
  • 1 tablespoon Ancho Chile powder
  • 1/8 teaspoon Cayenne Pepper
  • ½ cup unsalted butter (1 stick)
  • 1 ¾ cup lukewarm water (100°-105°F)
  • 1 ½ tablespoons active dry yeast
  • 1 ½ tablespoons kosher salt
  • 4 large eggs, lightly beaten
  • 1 large egg for the egg wash
  • 2/3 cup honey
  • 5 ½ cups unbleached all-purpose flour
  • 1 cup unsweetened cocoa powder (I used Ghirardelli )
  • 5 ounces finely chopped bittersweet chocolate (Ghirardelli 60% Cacao)
  1. Proof the yeast by taking it and mixing it with about ½ cup of the warm water and 1 teaspoon of the honey in a cup or a bowl. Allow it to sit in a warm place. Once it doubles in volume it is ready to use.
  2. While the yeast is proofing, make the ganache by melting the butter and the 4 ounces of chocolate in a double boiler. Once they are melted , add the chile powder and the cayenne pepper mixture and blend well with a whisk. Set aside to cool.
  3. Take the 5 ounces of chocolate and pulse until finely chopped in a food processor.
  4. Mix the proofed yeast, the rest of the water, and the honey with the eggs in your mixing bowl.
  5. Add the flour, the chopped chocolate, the ganache, and the cocoa powder and mix for 2 minutes using the dough hook attachment.
  6. Cover and allow to rest for 20 minutes.
  7. After 20 minutes, add the salt and mix once again for 2 minutes using the dough hook.

    Chocolate and Chile Ancho Dough

    Prior to the 2 hour proof.

  8. Cover and allow to proof for about 2 hours.
  9. Dust your work surface liberally with flour then take the dough from the mixing bowl. Dust dough liberally with flour and divide into 2 1 ½ lb. portions.
  10. Work each into a boule by stretching the surface of the dough around to the bottom, turning the dough in quarter turns as you go.
  11. Place on parchment paper and let the boules rise for 1 hour.

    Chocolate and Chile Ancho Boule

    A formed boule rising once again!

  12. Preheat your oven with the baking tiles or baking stones to 350F. Allow a minimum of 30 miuntes for the tiles to come to temperature.
  13. Simply take one egg and whisk it and then brush the surface of each boule with the egg wash.
  14. Slash the boules in a cross pattern, a tic-tac-toe pattern, or 3 vertical slashes.
  15. Bake the boules in the oven for about 15 minutes, then rotate to ensure even baking.
  16. Bake for a final 15-20 minutes.
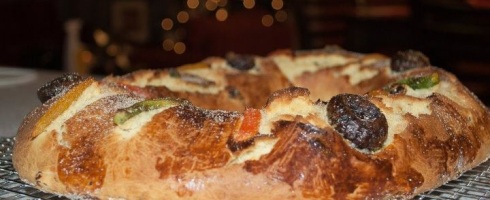
  17. Allow to cool completely on a wire rack. You can try and dust the boule with some powdered sugar if you want. I tried it on one boule!
Chocolate and Chile Ancho Bread

Dusted with some DelGrosso dust

Fresh Raspberry Preserves

  • 4 cups raspberries
  • 4 cups sugar
  1. Bring the raspberries to a hard boil in a saucepan over medium-high heat. Boil for 1 minute
  2. Add the sugar and bring to a boil once again.
  3. Cook for 5 minutes, stirring almost constantly.
  4. Remove from heat and ladle into prepared canning jars or if you plan on using it right away, just some airtight sterilized glass containers!

    Chocolate and Chile Ancho Bread with Fresh Raspberry Preserves

    Chocolate and Chile Ancho Bread with Fresh Raspberry Preserves

French Bread

24 Jan Pain Sur Poolish

Adding to my ever-increasing bread baking repertoire, this weekend I decided to try my hand at a French style loaf.  So again I consulted my sensei, Barry Harmon over at Artisan Bread Baking, prepared my oven for stone baking, and set about my craft.

I prepared the poolish on Friday night in a Tupperware container, covered it, and placed it inside my oven (oven not on!) so there would be no drafts to stunt the  fermentation. I found that doing this allowed me to get maximum growth during these winter months (my house is quite drafty!).  By Saturday morning, I had a nice pre-ferment to work with! The mixing, kneading, proofing, and folding went along as planned, it is more a matter of patience now than technique, I have a hard time waiting the necessary time for resting and proofing! I want to jump to the next step that I often find myself pacing back and forth to the kitchen!

I had no idea how to shape my loaf once I had the dough divided, so I happened upon a great instruction for shaping dough into a batard (thank God for the Internet) , then I simply stretched out the batard a bit to about 14 inches in length and let it rise again for another 2 hours. The baking is by far, my favorite part. I just love the smells wafting through my kitchen.  To me, nothing is more inviting to a home then the smell of fresh bread! This bread was a great addition to the Potato and Leek soup I made for Sunday dinner!

The Crumb

Take a look at the crumb!

Pain sur Poolish

Poolish

  • 300 g. Bread Flour
  • 300 g. Water
  • 5 ml (1 tsp)  Dry Active Yeast

Dough

  • All the Poolish from above
  • 690 g. bread flour
  • 300 g. Water
  • 24 g Salt
  • 5 gr (2 tsp) Dry Active Yeast
  1. Make the poolish the night before, cover the container and let it sit on the counter overnight.
  2. Mix all the ingredients together with the dough hook for 2 minutes. Then let the dough rest for 30 minutes.

    First Mix

    First mix

  3. Mix again with the dough hook for 15 minutes.

    Kneading

    After Kneading

  4. Put the dough in a lightly oiled bowl, cover and let ferment for 1 1/2 hours.

    Final Fermentation

    After Final fermentation

  5. Fold the dough (I used a Hammelman fold), then back in the bowl  to ferment for 30 minutes more.
  6. Divide the dough into two equal pieces (mine were about 680 grams each). Let the pieces rest, covered, on the counter for 10 minutes.

    Divided

    More or less divided!

  7. Shape each piece into a batard.

    Batard

    The Batard

  8. Let the loaves relax on a well-floured surface and covered by a damp towel, for 15 minutes.
  9. Gently stretch the loaves to a length of between 12 and 14 inches.
  10. Place the loaves on parchment paper and let them rise for 1 1/2 to 2 hours. They should double.
  11. Slash the loaves along the length of the dough right down the center.

    The Slash

    Slashed down the center

  12. Heat the oven to 475F / 245C. Place a pan of water in the bottom of the oven for steam and place the baking stone or tiles on the oven rack. (Let it preheat for about 45 minutes while your loaves are rising to get the stones to temperature)
  13. Bake, for 15 minutes, then turn the loaves and bake until done (about 30 minutes) or to an internal temperature of 200F / 93C  (the loaves will sound hollow when rapped on the bottom).

    After 15 minutes of baking

    After 15 minutes of baking

  14. Let the loaves cool on a wire rack.

    Cooling

    Cooling on the rack

Pain Sur Poolish

Final Product - Pain Sur Poolish

Italian Bread

9 Jan The Finished Product

There is bread, and there is fresh bread, then there is fresh homemade bread! I am completely and totally addicted to bread. Ever since I learned the techniques of using my Kitchen Aid mixer, I just cannot stop making bread on the weekend.  This weekend was no exception. My bread making adventures continued with Italian bread! This bread’s secret is the pre-ferment ( the poolish ) that I put together the night before and placed on my countertop. The pre-ferment gives the bread its flavor and helps out the texture. Using a pre-ferment gives you many of the benefits of a sourdough, but is a so much easier!

Oven Fresh Bread

Oven Fresh Homemade Bread

I again consulted my master artisan bread maker, Barry Harmon at Artisan Bread Baking, and decided to use the recipe for his standard Italian Boules. A boule, from the French for “ball”, is a traditional shape of French bread, but in this case I made it into Italian bread.  The original recipe called to use malt, but I could not source any malt in a hurry, so I just used sugar instead. This bread recipe took the better part of 4.5 hours to complete start to finish (not including the pre-ferment) and was so delicious that I nearly consumed one boule myself within a few hours of completion!

The finished product is a great accompaniment to any meal, although I would not really recommend it as sandwich bread due to its thick, deep crust.

The Finished Product
Fresh Italian Boules

Italian Boules


Poolish:

  • 200 g King Arthur Bread Flour
  • 200 g Water
  • 2 g (1/2 tsp.) Dry Active Yeast

Final Dough:

  • 890 g Bread Flour
  • 480 g Water
  • 15 ml (1 tbsp.) Dry Active Yeast
  • 15 ml (1 tbsp.) Salt
  • 225 ml (1/2 cup) Non-Fat Dry Milk
  • 15 ml (1 tbsp.) Extra Virgin Olive Oil
  • 15 ml (1 tbsp.) Sugar
  1. Make the poolish, cover it, and allow it to sit on the countertop for at least 24 hours at room temperature.

    Poolish

    The Poolish after 24 hours.

  2. After 24 hours put the poolish, water, sugar, yeast, oil, milk powder into the mixer bowl.
  3. Add half the flour and mix for two minutes using the paddle attachment.
  4. Switch to the dough hook and add the rest of the flour and mix for two minutes.
  5. Let dough rest, covered for 25 minutes (this is the autolyse).
  6. Add the salt and knead for 8 minutes.

    Post Kneading

    After Kneading, ready for first fermentation

  7. Cover and ferment for 1 hour.
  8. Perform a fold.

    First Fermentation

    After first fermentation

  9. Cover and ferment another hour.
  10. Perform a fold.

    Second Ferment

    After Second Fermentation

  11. Cover and ferment for 30 minutes.

    Final Fermentation

    After the Final Fermentation

  12. Shape into two equal loaves (mine was approx 880 grams each) place on parchment paper and rise for 50 minutes.

    Risen Boule

    Final Risen Boule

  13. Preheat the oven to 425F.

    The Oven

    My NON Commerical Oven with its $5 baking stone!

  14. Slash the loaves in three places across the top of each boule and place in the oven and bake for 20 minutes.
  15. After 20 minutes, rotate the loaves to ensure equal baking and bake for another 15-20 minutes or until the internal temperature reaches 200F.
  16. For a deeper crust, turn of the oven and let the loaves sit in the cooling oven for 5 minutes.
The Crumb

The Crumb

Rosca de Reyes

3 Jan Rosca de Reyes

Rosca de Reyes, or the “Kings Bread” is a wonderful tradition I have inherited from my wife’s family.  In Mexico, they do not celebrate Christmas the same way that we Gringos are accustomed. They do not have a Santa Claus and 8 tiny reindeer, or stockings and Black Friday. The children usually receive gifts from Los Reyes, the three Magi that followed the stars and travelled to receive Jesus in Bethlehem.  As the Three Kings arrived bearing gifts to Jesus, so too do the children receive gifts from the wise men on January 6th, the Día de Los Reyes.  As with most holidays in Mexico, there is also a traditional food associated with the day, and the Rosca is the food for Día de Los Reyes.  A Rosca is a wonderful sweet bread in the shape of a ring  that is usually baked with a porcelain or plastic baby Jesus inside. They say that the baby Jesus baked into the bread symbolizes the birth of Jesus in hiding from Herod the puppet King of Israel, but to me it is also means that I have to make tamales should my piece have the Baby Jesus inside it!

Living way up here in the Great White North of Maine, there is no place to buy a traditional Rosca, so as with most foods Mexican, I have to make it myself. I searched and searched for a recipe that would be equal to the Rosca that my mother-in-law would bring from La Panaderia Huesteca in Mexico City, which would be filled with cream cheese and walnuts and topped with citron peel, limon, and biznaga (candied cactus).  But not being very successful in finding a similar recipe, I settled on one from the legendary Diana Kennedy, I also used ALL organic ingredients (including the dried fruits), kosher salt, spring water, and added orange zest, walnuts, and golden raisins to the dough.  One important note is to make sure that ALL ingredients are at room temperature.  I learned this the hard way, when my first attempt failed to rise due to the yeast not activating correctly!

What came from this recipe was a delicious bread that can be served with Atole, Chocolate Abuelita, coffee, or just a simple glass of milk on Día de Los Reyes, so enjoy!

Rosca de Reyes

Fresh from the Oven!

Rosca de Reyes

(From The Art of Mexican Cooking by Diana Kennedy)

The Sponge:

  • 450 g unbleached organic bread flour
  • 15 g salt
  • 60 g organic sugar
  • 10 g yeast
  • 3 eggs
  • 145 g water

The Dough:

  • The Sponge.
  • 450 g unbleached organic bread flour
  • 60 g water
  • 8 egg yolks
  • Zest of one orange
  • 225 g organic sugar
  • 200 g organic unsalted butter, softened
  • 110 g Golden Raisins
  • 100 g chopped walnuts

For the Top of the Rosca:

  • 1 egg yolk
  • melted butter (organic of course!)
  • organic sugar
  • Dried or candied fruits (I used dried Kiwi, Mango, Papaya, Fig but I first soaked them in hot water for 10 minutes and drained them before placing on top. This helps prevent them from burning during baking.)

Method:

  1. In the bowl of a stand mixer with a dough hook, combine all of the sponge ingredients. Mix for about 10-12 minutes.
  2. Remove the dough hook, cover the mixing bowl, and allow the sponge to ferment until doubled, about 2 hours.
  3. With your sponge already in the mixing bowl add the dough flour, egg yolks, water, orange zest, and the sugar. Mix with the dough hook on low speed until combined, about 4 minutes.
  4. Continue mixing for an additional 5-7 minutes.
  5. Add the butter and mix at low speed for a minute or two, then at medium speed until the butter is fully incorporated into the dough.
  6. Turn the mixer back to low speed and add the raisins and the walnuts and mix until they are just incorporated.
  7. Transfer the dough to a lightly oiled container. Cover and ferment for 2 hours at room temperature.
  8. Turn the dough into a lightly floured counter. Divide it in two pieces and shape each piece into a tight ball and let rest, covered, for 20 minutes.
  9. Take two pieces of parchment paper and place a ball of dough on each sheet.
  10. For each loaf, make a hole in the center of the ball, and with floured hands, gently stretch the dough into a ring shape and lift the ring using the parchment paper and place on two baking sheets.
  11. Proof, covered, for about 3 hours, until almost doubled.
  12. Meanwhile, preheat the oven to 400F.
  13. Before baking, decorate the top with fruit and brush the dough and fruit with the egg yolk.

    Proofing

    Ready for the oven!

  14. Bake for 15 minutes, until browned. Remove the loaf from oven, brush with melted butter, sprinkle with sugar, and return to the oven for another 6 minutes. The internal temperature should be at least 190F.
  15. Cool on a wire rack.

    Cooling

    Cooling on the rack

French Baguettes

27 Dec Fresh Baguettes

Being a lover of ALL types of breads, I really have become quite fascinated with making my own. This week I went rather hardcore and decided to tackle the french baguette. Some say that the french baguette is a true test of a bakers skill. I could not help but think that I have bitten off more than I could chew!

Fortunately for me, there are plenty of great resources to find on the internet to hone my baking skills. I have found the one-stop-shopping place for all great artisan breads. Artisan Bread Baking. The site is a tremendous resource for beginner to intermediate at home bakers. So a special thanks to Barry Harmon for doing all the hard work and making this “easy” for the novice baker!

All measurements here are in metric. I found it much easier for weights and measures to do it is metric vs. standard. I lose patience with the fractions. You will need a food scale for this recipe also!

So I started bright and early on Saturday morning (using this recipe and method it requires a bit more than 7 hours start to finish!) with making my pre-ferment, which is called a poolish. The purpose of using a poolish,or a pre-ferment, is to have a portion of the bread dough that has already undergone some of the fermentation.

Poolish

Ingredients

  • 285 g Bread Flour
  • 285 g warm water
  • 1 g dry yeast

Method

1. Mix up all ingredients into a loose slurry and then let it sit, covered, on the counter for  2 or 3 hours before you use it.

Poolish
My Poolish after about 1 hour of fermentation
After my poolish was ready, I was now anxious to start my bread dough. I prepared my KitchenAid, attached the dough hook and added the following to the mixing bowl:
 

Ingredients

(updated 12/28/2011 – corrected amounts based on full poolish)

  • 565 g organic bread flour (I use King Arthur)
  • 225 g water (again use pure spring water)
  • 22 g kosher salt
  • 2 teaspoons (6 g) of dry yeast

Method

  1. Add yeast and water to the mixing bowl. Mix up for a minute or two, then add salt, your poolish (pre-ferment) and flour. Mix for two minutes, then let rest for 20 minutes.
  2. Knead using dough hook for 7 minutes ( I use speed 2 on mixer). The result should be a firm, slightly sticky dough.

    First Kneading

    After the First Kneading

  3. Remove the dough hook and cover. Let it rise for 45 minutes.

    First Fermentation

    After the first fermentation

  4. Perform a fold of the dough using the dough hook. This is simply letting the dough hook fall into the dough to de-gas it, then turning on the mixer on low speed and giving it about 4 revolutions. Remove the dough hook and turn the dough over and perform the same manuever again.
  5. Remove the dough hook, cover and let rise for 45 minutes.
  6. Repeat the dough hook fold once again. Place the dough back in the bowl, cover and let rise another 30 minutes.

    Final Fermentation

    After the final fermentation

  7. Remove from the bowl, repeat the fold again and place the dough on the counter and let it rest for 10 minutes under a towel (do not flour!).
  8. Divide the dough into 4 separate 400 g portions, then let the dough rest for 10 minutes under a moist towel.
  9. Shape into baguettes (Learn how to shape here!)
  10. I placed my formed baguettes on the countertop on lightly greased baking sheets and let them rise for 45 minutes covered with a moist towel.

    Shaped Baguettes

    My Shaped Baguettes!

  11. Heat oven to 440F.  (The original recipe calls to use baking stones, since I do not have any, I did not do this step, they turned out just fine without them!)
  12. Provide steam in the oven by placing a pan of water on the bottom of the oven (this will give it the nice crunchy crust!).
  13. Bake for 15 minutes, rotate the loaves to equalize baking.
  14. Bake until done about 32 minutes total time, since all ovens are different, recommended internal temperature is 195-200F.
  15. Turn the oven off and let the loaves sit in the cooling oven for 5 minutes.
  16. Remove the loaves from the oven!
 

Fresh Baguettes

Fresh from the oven!