Archive | Recipes RSS feed for this section

Sushito Integrale

24 Jun

It’s the Final Round of the Marx Foods Integrale Gauntlet! My final entry not only fuses the great Italian Integrale rice with some of the flavors of Mexico, but I also have found a way to add the cuisine of another of my favorite countries, Japan! Yes, that’s right folks, I present to you Mexican Sushi made with Italian Integrale rice! I really wanted to show everyone the versatility of this great product, and I think with the three entries I have made for the Integrale Gauntlet, from a risotto, to a rice pudding, and now sushi, I have really given this Italian short grain

Sushito Integrale

One may ask the question, What is Mexican Sushi? Well, it is not much different from the classic Japanese sushi that we all know and love. It just simply utilizes some Mexican flavors to kick up the volume. We replace the wasabi placed under the nigiri (a slice of raw fish on a thumb sized chunk of rice) with chipotle,  add in a little jalapeno in our futomaki ( or “fat” roll) , some ripe avocado,  toss in a little cilantro and we have our Mexican Sushi!

One of the challenges of making this dish was trying to get the Integrale rice to play the role of the classic Japanese sushi rice. I found that you need to tweek two parts in the process. I found that you needed to soak the rice for a extended period of time before cooking. I also needed to decrease the amount of water used in the preparation of the rice or else the rice becomes too much like dough.

Once I had cooked and seasoned my rice, I wanted to make two different types of rolls for my entry. I wanted to make the classic Futomaki, a seaweed encased sushi roll filled with cucumber, carrot,  jalepeño, and a hint of my chipotle mayo.  I call this the “Chilango” roll, a complete vegan roll inspired by the chic urban youth of Mexico City.  Next on my list was the “Mexicali’ roll. This is a Uramaki, or an inside-out roll. This type of roll is a bit more challenging because you have to flip the nori (the seaweed) over once the rice is spread out. For this roll I wanted to meld the flavors of smoked salmon, green onion, cream cheese, cilantro, and finally some avocado.  Now there was one more roll I wanted to make, but my rice supply was dwindling, so I set to making the Nigiri.

Chilango Futomaki and the Mexicali Uramaki

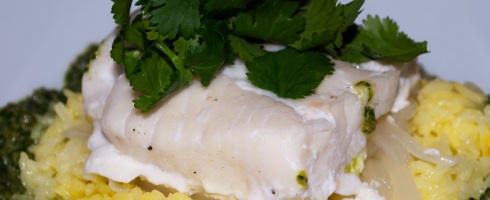
This is a fairly simple preparation that involves making a thumb-sized oblong portion of rice and slapping a piece of raw fish on top. I wanted to kick it up a bit and I slathered my chipotle mayo over the bottom side of the fish and then placed it on the rice. I had a beautiful portion of sushi-grade Ahi tuna, some smoked salmon (smoked locally in Maine of course!) , and some fresh jumbo shrimp.

The Nigiri

So here we are, two plates of delicious Italian-Mexican-Japanese inspired sushi! Grab an Asahi or some Saki and Kanpai!!!

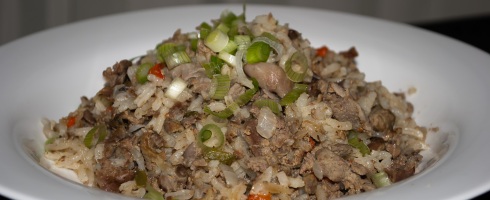
Integrale Sushi Rice

  • 1 cup of Integrale Rice
  • 1/2 cup of rice vinegar
  • 1/2 tsp kosher salt
  • 1/2 tsp organic sugar
  • 2 cups of water
  1. Place the rice in a large glass bowl and rinse the rice with cold water for 10 minutes or until the water become clear and no longer cloudy. You are rinsing all the starch from rice.
  2. Soak the rice in cold water for at least 1 hour.
  3. Dump the rice into a fine mesh sieve and allow to drain for at least 30 minutes.
  4. Place into a rice cooker and add the 2 cups of water.
  5. Set cooker to Cook and let it go!
  6. Once the switch resets to warm, allow the rice to steam for about 15 minutes.
  7. Remove the rice, using a wooden spoon, to a non-reactive bowl to season the rice.
  8. Place the rice vinegar, salt, and sugar in a cup and put in microwave for 15 seconds. We just want to dissolve the salt and sugar to make a solution.
  9. Now season the rice with vinegar solution.
  10. Allow the rice to cool to room temperature.

Chilango Roll

  • 3/4 cup sushi rice.
  • 1 nori sheets
  • Carrot
  • Cucumber
  • Jalepeno
  • Chipotle Mayo
  1. Take a nori sheet. Place it on the mat, with the shiny side facing down.
  2. Grab a handful of prepared sushi rice, and spread it gently over the nori – about 1cm high. There’s no need to press the rice onto the nori, only spread it.
  3. Line up the cucumber, carrot, jalepeño on the roll.
  4. Spread a bit of the chipotle mayo on the vegetables.
  5. Roll.
  6. Cut into 8 equal pieces. For best results first cut in half, then cut each half into two, and then again.
  7. Best served with soy sauce, pickled ginger (gari) and wasabi.

Chilango Roll and Mexicali Roll

Mexicali Roll

  • 3/4 cup sushi rice.
  • 1 nori sheets
  • Smoked Salmon
  • Green Onion
  • Avocado
  • Cream Cheese
  • Cilantro
  • Black and white sesame seeds
  1. Wrap your bamboo mat with plastic wrap. This is necessary in order to prevent rice from sticking to the mat.
  2. Take a nori sheet, and break it in half. Place one half on the mat, with the shiny side facing down.
  3. Grab a handful of prepared sushi rice, and spread it gently over the nori – about 1cm high. There’s no need to press the rice onto the nori, only spread it.
  4. Sprinkle a spoonful of black and white sesame seeds evenly over the rice.
  5. Flip the nori so that the rice is now facing down.
  6. Line up the green onion, smoked salmon, avocado, cilantro and some cream cheese on the roll.
  7. Roll.
  8. Cut into 8 equal pieces. For best results first cut in half, then cut each half into two, and then again.

Sushito Integrale

Ensalada de Nopales

20 Jun

Watch my video debut with the Taste of The Times where I make Ensalada de Nopales,  MexItaliano style!


Look for another great video for Risotto Milanese Mexicana,  next Wednesday at Taste of The Times!

Ensalada de Nopales

  • 6-8 Cactus Paddles (Nopal)
  • 1/2 Red Onion
  • 6-7 Cherry Tomatoes
  • 1/2 cup cilantro leaves, packed
  • 1-2 Chile Jalapeño or Fresno chiles
  • 1/4 cup Queso cotija or Queso Fresco
  • 2 cups fresh baby arugula
  • 1/2 ripe avocado sliced.
  • 1 tablespoon Extra Virgin Olive Oil
  • 1 tablespoon White Basalmic Vinegar
  • Salt and pepper to taste

  1. Clean the nopal to remove all the needles and nubs on each paddle.
  2. Julienne each nopal into small strips about 2 inches long.
  3. Rinse and then blanch the nopales in boiling, lightly salted water for about 5 minutes.
  4. Rinse the nopal with cold water or shock on ice bath.
  5. Slice the onion, halve the cherry tomatoes, and chop the cilantro. Combine with the nopales in a mixing bowl.
  6. Stem, devein, and remove the seeds from the chiles and dice then add them to the bowl.
  7. Season with salt and pepper. Dress with the olive oil and vinegar and mix well.
  8. Wash and spin the arugula, then place on serving dish or bowl as a bed for the salad.
  9. Empty contents of mixing bowl on top of the arugula. Sprinkle with the crumbled cotija, top with the avocado slices and serve!


Peanut Butter and Jelly “Risotto”

5 Jun Peanut Butter and Jelly "Risotto"

Here we go with Round 2 of the Marx Foods Integrale Gauntlet! In this round, we were challenged in making a sweet dish with the same Integrale Rice supplied by Marx Foods.  This dish was inspired by a friend, Heather Atwood, who once mentioned a Peanut Butter & Jelly Risotto , in jest, during a conversation on Twitter. Now, truth be told, this was pertaining to a savory risotto, which would have been a whole lot more challenging, but the inspiration is still legitimate. Once I heard this, I knew I had to make it!

Peanut Butter and Jelly "Risotto"

Peanut Butter and Jelly “Risotto”

For this dish I simply wanted to create a peanut butter rice pudding and I wanted the jelly to be made from something fresh and in season.  Strawberries are definitely in season here in New England so they seemed to be a perfect fit! To finish it off, I needed to find a way to add that simple Mexican twist that I love. So taking the basic building blocks of a peanut butter rice pudding, a fresh strawberry jelly, and the added twist of grated Mexican chocolate, I present to you The Peanut Butter and Jelly “Risotto”.  I call this a “risotto” because I approached the preparation of the rice pudding in fairly the same manner as I would a risotto, except instead of adding broth, I added milk! You will notice that I use no custard in this recipe. This is because my daughter has a severe food allergy to eggs and she wanted to try this one!  Do you think this is a one way ticket to the next round?Peanut Butter and Jelly "Risotto"

Peanut Butter Rice Pudding

  • 1 cup Integrale Rice
  • 3 cups fat free milk (Horizon Organic)
  • 3/4 cup light brown sugar, packed
  • 1/4 cup organic creamy peanut butter
  • 1/2 teaspoons vanilla
  • 1/2 teaspoon ground cinnamon
  • 1 teaspoon grated Mexican Chocolate (Ibarra or Abuelita)
  • Pinch salt
  1. In a medium saucepan over medium high heat, combine the rice, 3 cups of milk, and brown sugar
  2. Cook, stirring, until the mixture just begins to boil (being careful not to scald the milk). Reduce heat to medium-low and continue cooking, stirring frequently, until rice is almost tender and most of the milk is absorbed. This will take about 30 to 35 minutes.
  3. Meanwhile, mix the peanut butter, vanilla, and cinnamon together and then add to the rice mixture. Cook for another 5 minutes, then remove from heat and chill.
  4. Serve in 6 ounce ramekins with the All-Natural Strawberry Jelly and dust with the grated Mexican chocolate!

All-Natural Strawberry Jelly

  • 2 Cups Fresh Stawberries
  • 2 Cups Organic Sugar
  1. Chop the strawberries and heat in a medium saucepan on medium-high heat.
  2. Cook the strawberries down for about 5 minutes then macerate them to a pulp.
  3. Add the sugar and cook for another 5 minutes, stirring continuously.
  4. At this point the fruit should release its natural pectin, so remove from heat, cool, then preserve in your jars or containers.

    Peanut Butter and Jelly "Risotto"

    Peanut Butter and Jelly “Risotto”

My “Dirty” Little Secret

16 May Dirty Rice

My cooking is often influenced by memory; these memories being the food that my father cooked when I was a child. He used to tell me stories of how he would remember his mother taking various pieces offal and creating wonderfully simple, but delicious dishes. He often recreated these dishes at home, often to the displeasure of my sisters. One of these dishes was rice and chicken livers. I fell in love with this dish, I love the flavor that chicken livers bring to a dish, and it is delicious in a bed of rice. I never knew it until years later, but this dish was the Cajun classic, dirty rice!

Don’t be afraid, “dirty” rice really is not dirty or unclean as the name suggests. Dirty rice is a traditional Cajun dish made from rice cooked with small pieces of chicken liver and/or giblets and like most recipes, there are countless ways to prepare dirty rice, including a few recipes that don’t even call for chicken livers and gizzards, but use sausage or ground beef. Personally, this dish just is not the same without the chicken livers and giblets. I really savor the flavors of the chicken livers and the snap of the giblets, they both add contrasting textures to the rice. I too have made this a couple different ways, I have a version which uses saffron and red beans that is just as delicious. This recipe is a simple, yet an authentically full-flavored version.

I would suggest serving with Halibut Braised in Chipotle or  Pan Seared Bay Scallops ,it is even hearty enough to stand on its own legs. Just be sure to serve it with and a quality Pinot Noir!

This post is the first of a series of rice dishes that will be coming this month as I “train” for the upcoming Marx Foods Integrale Gaunlet. So please come back and find out how I plan to take my second consecutive recipe challenge from Marx Foods!

Dirty Rice

  • ½ lb. Chicken Livers
  • ½ lb. Chicken Giblets (hearts and gizzards)
  • 1 red bell pepper, diced
  • 1 large jalepeno, diced
  • ½ white onion, diced
  • 2 cloves of garlic, minced
  • 2 cups White Rice ( I used Jasmine)
  • 4 cups chicken broth
  • 1 tbsp. Fresh Oregano
  • 1 tsp. Dried Thyme
  • ½ tsp. White Pepper
  • Salt to taste
  1. In colander, rinse rice several times until water runs clear.
  2. Take the chicken livers and soak in milk for about 10 minutes.
  3. Take the giblets rinse well, and pat dry. Place in a food processor and pulse a few times to get a nice dice.
  4. Rinse the livers and chop well.
  5. Take a large sauté pan and heat about 2 tablespoons of olive oil over medium-high heat.
  6. Add the giblets, season with salt and white pepper and sauté, stirring occasionally, about 2 minutes.
  7. Add the livers and the dried thyme, continue to sauté for another 5 minutes
  8. Remove the livers and giblets from the heat and place in a dish and set aside.
  9. Put another tablespoon of olive oil in the sauté pan and put back on the heat.
  10. When the oil shimmers, add the onions, garlic and sauté until the onion just turns translucent.
  11. Add the red pepper and the jalepeno pepper, continue to sauté for another 2 minutes.
  12. Add the rice and continue to sauté for about another 2 minutes, constantly stirring.
  13. Add salt to taste and the fresh oregano.
  14. Take the livers and giblets and add to the rice, mix well.
  15. Add the warm broth and cover.
  16. Reduce the heat to low
  17. Cook for about 20 minutes, or until all the liquid is absorbed.
  18. Serve, garnished with diced scallions.

    Dirty Rice

    Dirty Rice

Morel Madness and the Audacious Soufflé

23 Apr Morel, Wild Ramp & Goat Cheese Souffle

This week I have the extraordinary opportunity to be a participant in the Marx Foods 4th Annual Blogger Morel Recipe Challenge.  This is an annual contest open to bloggers like me or, to coin a phrase, “morelnauts”, to help celebrate the Morel mushroom, which comes into season in a few short weeks. I simply offered up my interest, and was dutifully accepted!  So, having received my free sample of dried morels, it was time to suit up.

Dried Morels

My first thought, after consulting with my wife, was to make a fresh ramp and morel quiche, but I really wanted to put some sizzle into my entry. So after pondering it for a bit, I thought, “Fortune favors the audacious”, I instantly said, SOUFFLÉ! Problem number 1; I had never made a soufflé before! I had all the flavor affinities in my head, the eggs, the morels, the ramps, the goat cheese. I just needed to learn how to make the vehicle! So on Saturday, I went about my research and even took a test drive and made a Mexican Chocolate Soufflé! I soon learned that a savory soufflé is nothing more than an enriched bechamel sauce with some egg whites folded in! I can make a bechamel with my eyes shut, so this should be fun!

Morels have a unique earthy flavor and a musty aroma that pairs quite well with the pungent, garlicky-onion flavor of the fresh ramps. They are both at their prime in the spring, so why not use them together! I was able to find some fresh ramps at a local purveyor this weekend, and I thought why not deepen that earthy flavor with the deep smoky flavor of the poblano chile and toss in some rich, tangy goat cheese.  Finally I added a bit of freshness with the chopped cilantro plus,  I cannot be too far away from my Mexican flavors!

Fresh Ramps!

Fresh Ramps!


Well, here it is, my entry into the Marx Foods 4th Annual Blogger Morel Recipe Challenge! Enjoy…

The lucious Morel Soufflé

The lucious Morel Soufflé

Morel, Wild Ramp, Poblano & Goat Cheese Soufflé

  • 2 oz. dried morels
  • 2 chile poblanos
  • 4 oz. fresh ramps
  • 2 oz. fresh goat cheese
  • 1/4 cup fresh cilantro
  • 1/4 tsp. dried thyme
  • 6 tablespoons unsalted butter
  • 4 tablespoons flour
  • 1 1/4 cups milk
  • 4 egg yolks
  • 4 egg whites
  1. Preheat an oven to 375 degrees.
  2. Take 4 – 8 oz. souflee cups and grease with some butter.
  3. Soak the mushrooms in hot water for about 30 minutes.
  4. After 30 minutes, drain and dry very well with some paper towels.
  5. Roast the Poblanos in the oven, then peel, remove the seeds and de-vein. Chop to a nice dice and set aside.
  6. Wash the fresh ramps and remove the roots and the greens
  7. In a food processor, place the morels and the ramps and pulse several times to a nice coarse chop.
  8. In a medium sautee pan, heat 2 tablespoons of butter over medium-high heat. Then saute the ramps and morels for about 3-4 minutes, ensuring that any liquid is cooked off.
  9. Add the chopped poblanos and the dried thyme and continue to sautee for another 2 minutes to incorporate all the flavors. Then set aside.
  10. For the bechamel, heat 4 tablespoons of unsalted butter in a saucepan over medium heat.
  11. Once the butter is melted, add the flour and whisk until smooth. Continue to cook until the mixture has a slightly golden color and smells a bit nutty, about 3 minutes.
  12. Take the milk and add it a bit at a time, continuously whisking as you add the milk. I usually add it in 1/4 cup portions. Make sure to whisk out any lumps!
  13. Once all the milk is added, add the goat cheese and season the bechamel with white pepper and salt.
  14. Now, incorporate the mushroom, ramp, and poblano sautee, and the chopped cilantro, mix well.
  15. Remove the sauce from the heat.
  16. Separate your yolks and whites, whisk the egg yolks until they are a pale yellow.
  17. Take about a large spoonful of the bechamel and temper the yolks so they do not cook once you add them to the bechamel.
  18. Once they have been tempered, add them to the bechamel and mix well. Cover the pan with some plastic wrap to prevent a skin from forming on the sauce.
  19. Take the egg whites and whisk until the have hard peaks (I take the bowl and invert it over my head, if they do not fall out and hit me, the whites are ready!) TIP: For greater lift make sure you use egg whites that are at ROOM TEMPERATURE!
  20. Now fold the whites into the sauce in 3 different stages. Simply divide the whites into thirds and fold each section separately.
  21. Take your greased souflee cups and spoon the sauce into each one a little more than 3/4 of the way up each one.
  22. Place in the center of your oven and bake for about 20 minutes.
  23. Quick!!! Serve immediately before they deflate!

Morel, Wild Ramp & Goat Cheese Souffle

Caldo de Camarón

12 Apr Caldo de Camarron

Can any two words be more delicious than Shrimp Soup? Now take that simply delicious shrimp soup and add a little Mexican flavor and you have the classic Caldo de Camarón.

Caldo de Camarón

Caldo de Camarón

Among all the tacos, tostadas, enchiladas, and tamales, Mexico also has a very large repertoire of soups, especially seafood based soups. Among those is the classic Caldo de Camarón. This hearty, slightly spicy soup is built upon a base of chile guajillo, a delicious shrimp broth, chunks of potatoes and carrots, and finished with fresh peeled shrimp. Luckily, I was able to find some fresh native shrimp at the local fishmonger, so this was a welcome treat to our Easter Sunday brunch!

In Mexico, this soup is often given complimentary in many restaurants, served in little shot glasses! It is a very delicious way to welcome you to their restaurant…

So as you welcome those special guests to your table, just remember to serve it very hot and always have fresh limes ready to be squeezed in the soup!

Buen Provecho!!!

Caldo de Camarón

  • 4 Red Potatoes, peeled and cut into 1/3-inch cubes
  • 2 large carrots, peeled and cut into 1/3-inch cubes
  • 8-10 Chile Guajillo
  • 1.0 lbs. Shrimp.
  • 3 cloves of garlic
  • Salt & Pepper to Taste
  1. Peel and devein shrimp under cold running water, reserving peels and shrimp separately; set shrimp aside.
  2. Take shells, the onion, 2 cloves of unpeeled garlic, and ½ tsp of salt put in a stockpot and add about 3 quarts of water. Bring to a boil and simmer for about 30-40 minutes.
  3. Strain broth and put liquid back into a stockpot and keep warm.
  4. Toast the chiles on a comal and then soak in hot water for 20 minutes. After 20 minutes, remove the stems and seeds and place in a blender with 1 clove of garlic, a peel of onion, and about 2 cups of soaking liquid. Blend to a puree.
  5. In another stockpot, heat about a tablespoon of oil over medium-high heat, Strain the puree over the oil and then simmer for 8 to 10 minutes over medium-high heat, allowing the puree to season and thicken.
  6. Add the shrimp broth that you had set aside, add the carrots, potatoes.
  7. Bring broth back to a simmer, and simmer  for 5 minutes.
  8. Turn heat to high, add shrimp, bring to a boil, and simmer briefly until shrimp are done.
  9. Add the chopped cilantro and add salt to taste.
  10. Ladle soup into large soup bowls, and serve with lime wedges.

    Caldo de Camarron

    Caldo de Camarron

Mixotes de Pollo

5 Apr Mixotes de Pollo

I love waking up in Mexico City… Each morning in my suegra’s house is to awaken every sense in one’s body. The first to awake is sound; you can hear the commotion of the city, car horns going off, the sounds of the street workers yelling “Glooooobos” or the occasional “Tamales Oaxacaños” recording. The next is sight; the bright sun of the Valle de México shining through your eyelids, kick starting your brain. Then comes smell; there is nothing quite like the aroma of my suegra‘s kitchen wafting up the stairs and into the bedroom. It often brings me back to the old cartoons, where the aromas were like hands, grabbing the antagonist and leading them to their savory desires.  Finally, there is touch; to walk downstairs, sit down and take a fresh corn tortilla, a cup of café de olla, and a plate of  freshly prepared mixotes is the final step to waking up in Mexico City!

Mixotes de Pollo

Mixotes de Pollo

Among all the delicious dishes my suegra makes, one of my Top 5 favorites is Mixotes.  Mixotes is a dish typical of central Mexico and the name derives from what I believe to be the method (traditionally the meat is wrapped in the leaves of the Maguey cactus the ‘Mix’ ) and the cooking technique ( the ‘otl’ part or the ‘otes’ plural) , but I am not a Nahuatl expert so don’t quote me as the source of this linguistic synopsis. I digress, Mixotes can be made with almost any type of meat. I have had ram, lamb, and of course in the case of this recipe, chicken. The traditional way is to season the meat with a chile paste and wrap in the leaves of the Maguey, very similar to barbacoa, add a scoop of nopales, and to pit roast the packages for several hours. The modern preparation is to prepare En Papillote  and steam the packages. In this case, we use foil instead of parchment paper. The chipotles used in this dish smell particularly delicious because of the smoky, earthy flavor that dried chipotles bring to the party. Those smells are the little hands that bring me down those stairs in the morning!

The final result is a wonderful spicy dish in plenty of chipotle flavored broth, tender cactus, and succulent chicken. I open up that package, close my eyes, and I am transported back to my suegra’s kitchen! Enjoy!


Mixotes de Pollo

  • 6-7 Chicken Quarters (Legs & Thighs)
  • 12-13 Dried Chipotles Moras
  • 1 cup cilantro leafs, loosely packed
  • 6-7 Nopales (cactus paddles)
  • 1 Large Onion
  • 1 clove garlic
  • Salt & Pepper to taste
  1. Put the chipotles in a saucepan with water and bring to a boil over medium-high heat. Reduce heat to a simmer and simmer for about 10 minutes.
  2. While the chipotles are boiling, clean the nopales and cut into thin 1 inch or less strips.
  3. Place the nopales in a medium saucepan with water and bring to a boil. Boil for about 3-5 minutes. Then drain and rinse with cold water, and let drain.
  4. Take the chicken and remove the skin, rinse well and pat dry. Place in a large mixing bowl.
  5. Slice the onion thin using a mandolin and combine with the chicken in the mixing bowl.
  6. Add the nopales to the mixing bowl.
  7. Wash the cilantro and remove the stems, add to the mixing bowl.
  8. Once the chipotles are tender, put on some food service gloves and remove the stems and seeds, place in a blender with the clove of garlic and about 1/4 cup of the liquid you boiled the chipoltes in. Puree the mixture well and add to the mixing bowl.
  9. Cover and place in the refrigerator for about 30 minutes to allow the chicken time to marinate in the chile mixture.
  10. Grab some aluminum foil and make 6 sheets, make them large enough to wrap two pieces of chicken and some of the chile & vegetable mixture.
  11. With a large spoon, scoop out two pieces of chicken and some of the vegetables, place in the center of the foil and fold up the package, do this until all the chicken is wrapped into individual foil pouches.
  12. Place the pouches in a large pot with about 1.5 inches of water, you can place a bowl inverted in the bottom and then place the packages on top of and around the bowl, this will allow the packages to steam. OR you can use a spaghetti cooker (the one with the strainer insert).
  13. Bring to a boil over medium-high heat and steam the packages for 45 minutes. After 45 minutes, take out a package and check the chicken to ensure it is fully cooked.
  14. Serve with Saffron Rice or Frijoles de Olla.
Mixotes de Pollo

Mixotes de Pollo

Flan Napolitano

2 Apr Flan Napolitano

In the center of Mexico City, not far from where the Aztec main temple, Templo Mayor, once stood, there is the famous restaurant, El Cardenal. El Cardenal is an elegant place with white table cloths, white coated staff, and wonderfully delicious traditional Mexican cuisine. We go to this restaurant each and every time we are in Mexico City, primarily because they have the most decadent desserts to be found anywhere in Mexico. Among my favorites is Flan Napolitano, a delicious creamy custard covered in a sugary caramel, it is one of Mexico’s most famous desserts!

Flan Napolitano

Flan Napolitano

Flan has a long and glorious history that reaches back as far as Ancient Rome. When the Roman Empire collapsed, the custard recipe they developed became popular throughout medieval Europe.  As the recipe was replicated and adapted, it became more and more sweet. In Latin, the dessert was known as flado, for custard, it is from the French that it eventually became Flan.

In Mexico, flan was taken to a whole new level. Traditional flan is made with eggs, cane sugar, vanilla,  and cream.  It is prepared by first making sugar syrup cooked to a caramel, poured into a mold, or in my case, small soufflé molds, then finally adding the custard. It is cooked in the oven in a water bath to prevent the custard from curdling and to keep the top of the custard moist. Flan Napolitano is a bit different, in that it is made by adding cream cheese and queso doble creama to the custard. This gives the flan a much more rich and creamy texture. Flan is perfect for cooling the palatte after a spicy, chile based dish, this is why it is so popular in Mexico. There are other flavors as well; pumpkin, almond, and even coconut. But my favorite is still the classic vanilla.

In my interpretation, I decided to try to use marscapone instead of queso doble creama. The result was simply MexItaliano!

Right from the oven

Fresh from the oven taking a little bath!


Flan Napolitano MexiItaliano

Ingredients:

  • 2 cups sugar
  • 2 tablespoons water
  • 14 ounces (1 can) sweetened condensed milk
  • 1 12-ounce can evaporated milk
  • 9 ounces cream cheese
  • 9 ounces Mascarpone Cheese
  • 10 eggs
  • 1/2 of a vanilla bean
  • Pinch of salt

Directions:

For the caramel:

  1. Combine 1 cup sugar with the a bit of water in a saucepan and place over medium-high heat.
  2. When the sugar begins to melt, swirl the pan over the heat for 10 minutes, until it darkens to a honey-amber color.
  3. Remove from heat and immediately pour into each flan mold, tilting it so the caramel evenly coats the bottom.
  4. Place the molds in a large roasting pan and set aside.

    Making the caramel

    Making the caramel

For the flan:

  1. Preheat oven to 325 degrees.
  2. Bring about 4 cups of water to a simmer and keep it hot. You’ll use this for your water bath.
  3. You will need to slice the vanilla bean down the sides and remove the inner seeds, to do this take a pairing knife and slice it lengthwise, open it up and scoop out the inner seeds and place it in the bowl.
  4. Combine  the condensed milk, evaporated milk, cream cheese, crema and vanilla in a saucepan and place over medium-low heat.
  5. Bring to a simmer, stirring occasionally, but don’t allow it to come to a full boil, once it is throughly combined into a cream, remove from heat.
  6. Whisk together the eggs and remaining 1 cup sugar in a large bowl, add a pinch of salt. Whisk vigorously until thick and pale yellow in color.
  7. Now, GRADUALLY whisk the cream into the egg mixture, but be careful not to add it too quickly or the eggs will cook (What I do is combine the cream and the eggs together a ladle at a time)
  8.  Pour the custard into the caramel-coated flan molds.
  9. Carefully pour the hot water from the kettle into a roasting pan so that it’s about halfway up the side of the molds. 
  10. Transfer to the middle rack of the oven. Bake for 30-35 minutes.
  11. If you notice during this time that the surface is starting to turn golden-brown but it’s not fully cooked yet, cover it with foil so it doesn’t burn.
  12. You may also periodically insert a knife into the center of the flan to check for doneness. When the knife come out clean, it’s done; when the custard is just set and slightly jiggles, it’s time to take it out.
  13. Let custard cool completely in the water bath. Refrigerate for 2 hours.
  14. To serve, run a knife around the inside of the mold to loosen the flan. Place a serving plate over the mold and invert it to pop the flan out

    Flan Napolitano

    Flan Napolitano

Bacalao en Cilantro

28 Mar Bacalao con Cilantro

If you ever get to travel to Mexico’s Gulf Coast, you will find that Mexicans really know their fish; it’s not all just about tacos and Ceviche!  Bacaloa en Cilantro

I had some fresh Haddock filets that I wanted to cook and my family does not particularly like the standard approach New Englanders take to their seafood; often deep-fried in heavy breading, or baked, drowned in butter and topped with crackers. Sometimes, there is nothing better than whipping up some beer-batter, deep-fry those filets, and have yourself some luscious Baja Fish Tacos, but were looking for something a bit more healthy! As I went through the recipe Rolodex in my head, I remembered a recipe that I once read in Diana Kennedy’s The Essential Cusines of Mexico for Pescado en Cilantro. In her version she uses snapper, but I had no access to fresh snapper, so I improvised and used the haddock instead!

 What I really like about this dish is the sauce. The chile, onion, and cilantro flavors combined with the fiery juice from the can of chiles make for a unique combination. To accompany this dish, I decided on using my go-to recipe of Saffron Rice. I just love the flavor of saffron with seafood.

You can go about the preperation two different ways. You can make the sauce and add the sauce to the casserole dish halfway through cooking, or you can simply drizzle it on the fish once you plate. I, out of sheer forgetfulleness (I wanted to cook the fish in the sauce to add the flavors of the fish and lime), ended up drizzling the sauce around the rice. It all turned out well in the end, the acidity and heat of the cilantro sauce complimented well with the fish and rice. After all, the taste of the sea, the chiles, cilantro, and saffron seem to be a match hard to beat!


Bacalao en Cilantro

(Baked Haddock in a cilantro sauce)

  • 2-3 pounds haddock or cod, cut into 6 ounce portions.
  • 1 onion, sliced
  • 3 Jalepeños em escabeche
  • 1 cup of cilantro, packed
  • 1/3 cup lime juice
  • 3 tablespoons juice from the chile can
  • 8 tablespoons olive oil
  1. Preheat oven to 400°F
  2. Cut the fish into 6 ounce portions
  3. Pour 2 tablespoons of olive oil into a saute pan and saute the onions over medium high heat for about 5-6 minutes.
  4. In a casserole dish pour the lime juice and lay down half the onions.
  5. Season the fish with salt and pepper and place the fish on the bed of lime juice and onions, drizzle 2 tablespoons of oilve oil and place the rest of the onions on the fish
  6. Cover with foil and bake in oven for about 20-25 minutes, depending on the thickness of the fish.
  7. Take a clove of garlic, the jalepeños, the juice from the chile can and the cilantro and place into a 3 cup food processor, drizzle in the remaining olive oil with the motor running.
  8. When the fish is cooked, serve by laying down the saffron rice, top the rice with onions and a piece of the fish. At this point you can drizzle on the sauce or spoon it along the circumference of the rice. Top with chopped cilantro and serve!

    Bacalao con Cilantro

    Bacalao con Cilantro

Saffron Rice

  • 1 1/2  cups white jasmine or basmati rice
  • 1/4 white onion diced
  • 1 garlic clove minced
  • 1/4 teaspoon Saffron threads
  • 2 1/2 cups water
  • 1/2 teaspoon Kosher salt
  1. Place the water, saffron, and salt in a small saucepan and bring to a boil, then turn off to let the saffron steep.
  2. Heat oil in a 5-quart heavy pot over medium-high heat until it shimmers.
  3. Add onion, rice, and garlic to the pot and cook, stirring, until fragrant, about 2 minutes
  4. Add the saffron mixture and bring to a simmer.
  5. Reduce heat to low and cook, covered, until water is absorbed and rice is tender, 18 to 20 minutes.
  6. Let rice stand, covered, off heat 5 minutes
  7. Fluff with a fork and serve with your fish!

Shadone – The Italian Easter “Pie”

26 Mar Easter Shadone

If you know any Italians, one thing you would be sure to remember is that we are filled with so many traditions when it comes to food. We have a dish for just about any holiday on the calendar. For my family, it is the “Seven Fishes” on Christmas Eve, the Cavatelli for Christmas Day, the Ravioli on New Years Day, and for Easter we have Shadone.

Easter Shadone

Shadone

Shadone is a rather reclusive dish. If you Google it, you probably will not find much information on its source or on its history. Like all dishes in Italy, they are quite regional, so my guess is that it originated somewhere in Northern Italy, possibly the region of Liguria, as this is where eggs were used most in Italian cuisine. I would say it is more of an educated guess than fact though, so don’t hold me to that!  Those of you more familiar with the Pizzagaina, may find it to be very similar to Shadone as well. I find it to be a cross between a Quiche, a pie, and a Calzone. The star of the dish is of course, centered on the symbol of Easter, the Egg!

Shadone is a decadent Easter bread filled with plenty of eggs, cheeses, and pepperoni (salami). It is a bit involved to make, and it was a bit challenging for me as I have never made it before. I seemed to spend an unusual amount of time making my iPhone dirty by trying to call my father to get his tips and tricks! One of the things I loved about this was the smell. I remember smelling the aromas of the salami as it baked in the oven! There are few aromas better to my nose than pepperoni and bread baking in the oven! We generally would eat this as a starter before our Easter brunch. But it also makes a great breakfast, so grab a nice big slice and a cappuccino and enjoy! Buona Pasqua!

Shadone

Fresh from the Oven


Shadone

(The DelGrosso Italian Easter “Pie”)

Filling:

  • 1 1/4 lbs. Dried Salami, Sopresseta, or “Pepperoni”
  • 1 3/4 lbs. Ricotta Cheese
  • 1/2 lb. Queso Fresco
  • 4 Hard boiled eggs
  • 1/4 cup grated Pecorino Romano cheese
  • 5 eggs
  • Salt and Pepper to taste

Dough

  • 4 Eggs
  • 1/4 lb. Butter
  • 1 cup milk
  • 2 tsp. salt
  • 2 tsp. baking powder
  • 5 cups Unbleached All-Purpose Flour
  1. Hard boil the eggs; Place the eggs in cold water in a medium saucepan, making sure they have about 1 inch of water covering them.
  2. Put about a teaspoon of salt in the water and heat the eggs on high heat to a boil. Once it comes to a boil, turn the heat to medium and continue to boil for 1 minute.
  3. After one minute, cover, and remove from the heat. Let sit for 12 minutes. Your eggs should be perfectly hard-boiled. Set aside to cool completely.
  4. Chop the salami into small cubes, I basically julienne the salami.
  5. Peel and chop the hard-boiled eggs.
  6. In a large mixing bowl combine the pepperoni, hard-boiled eggs, the cheeses. Add the lightly beaten eggs and mix well.
  7. Add some cracked black pepper and some salt. At this point I taste for seasoning, but if you are queasy about eating raw egg, you can skip this. I added about 1 teaspoon of salt and about 1 1/2 teaspoons of black pepper.
  8. Once the filling is ready, you can cover with some plastic wrap and put it in the fridge while you work on the dough.
  9. For the dough, place the dry ingredients (flour, salt, baking powder) into your Kitchen Aid mixing bowl and use the paddle to mix for about 1 minute.
  10. At this point I placed my tiles in the oven on the bottom rack and preheated the oven to 350°F.
  11. Then detach the bowl and add the cold butter in chunks. Use a pastry blender and work the butter into the flour until the mixture becomes crumbly and you no longer pull butter out of the pastry blender.
  12. Attach the mixing bowl and switch to the dough hook.
  13. Whisk the eggs and the milk together in a separate bowl and add to the dry ingredients.
  14. Mix on low-speed for about 2 minutes.
  15. Now, I did something different here, instead of continuing to knead, I took the dough out, folded it a couple of times, then placed it back into the mixing bowl. I wanted to make sure that all the flour was incorporated into the dough.
  16. Turn the mixer back on low and knead for 8 minutes.
  17. Cover it in plastic wrap and let it rest for about 10 minutes on the counter.
  18. Now, since this was my first time making this recipe, I kind of winged the rest of this:
  19.  I took a portion of dough a bit larger than an orange, flattened it with my hands, dusted it with flour  and fed it through my Kitchen Aid pasta roller on setting #1.
  20. I dusted it again with some flour and fed it through setting #2.
  21. I cut the sheet in a length about  24 inches, lay it down on a dusted countertop or pastry board. I rolled it along its width with a rolling-pin to make it a bit thinner and open it up a bit to about 8 inches.
  22. I cut the sheet in half (One for the bottom, one for the top) and placed about 1 cup of filling in the center of the bottom sheet, spread it out a bit with your spatula, but be sure to leave about an inch all the way around the sheet for you to close it up.
  23. Now place the top half of the sheet over the bottom sheet with the filling. Cut off any excess dough to even up the edges.
  24. Fold up the edges and corners, and seal with a fork in a cross-hatch pattern all around the pie (very similar to sealing ravioli).
  25. Baste with some egg wash, but do not baste the sealed edges and corners, just the top.
  26. At this point you have an option. You can slash it a couple of times across the top, or take a toothpick and poke some holes in the top gently to allow the steam to escape. I did half one way and half the other way to see what was better, I personally like the slash method!
  27. Place on parchment paper before setting on the tiles so that you do not burn the bottoms.
  28. Bake in the oven for about 1 hour.

    Shadone

    Halfway through baking!

  29. Place the pies on a wire rack and allow to cool completely. Refrigerate or freeze what you do not eat.

    Shadone

    Shadone