Archive | MexItaliano Food RSS feed for this section

Sushito Integrale

24 Jun

It’s the Final Round of the Marx Foods Integrale Gauntlet! My final entry not only fuses the great Italian Integrale rice with some of the flavors of Mexico, but I also have found a way to add the cuisine of another of my favorite countries, Japan! Yes, that’s right folks, I present to you Mexican Sushi made with Italian Integrale rice! I really wanted to show everyone the versatility of this great product, and I think with the three entries I have made for the Integrale Gauntlet, from a risotto, to a rice pudding, and now sushi, I have really given this Italian short grain

Sushito Integrale

One may ask the question, What is Mexican Sushi? Well, it is not much different from the classic Japanese sushi that we all know and love. It just simply utilizes some Mexican flavors to kick up the volume. We replace the wasabi placed under the nigiri (a slice of raw fish on a thumb sized chunk of rice) with chipotle,  add in a little jalapeno in our futomaki ( or “fat” roll) , some ripe avocado,  toss in a little cilantro and we have our Mexican Sushi!

One of the challenges of making this dish was trying to get the Integrale rice to play the role of the classic Japanese sushi rice. I found that you need to tweek two parts in the process. I found that you needed to soak the rice for a extended period of time before cooking. I also needed to decrease the amount of water used in the preparation of the rice or else the rice becomes too much like dough.

Once I had cooked and seasoned my rice, I wanted to make two different types of rolls for my entry. I wanted to make the classic Futomaki, a seaweed encased sushi roll filled with cucumber, carrot,  jalepeño, and a hint of my chipotle mayo.  I call this the “Chilango” roll, a complete vegan roll inspired by the chic urban youth of Mexico City.  Next on my list was the “Mexicali’ roll. This is a Uramaki, or an inside-out roll. This type of roll is a bit more challenging because you have to flip the nori (the seaweed) over once the rice is spread out. For this roll I wanted to meld the flavors of smoked salmon, green onion, cream cheese, cilantro, and finally some avocado.  Now there was one more roll I wanted to make, but my rice supply was dwindling, so I set to making the Nigiri.

Chilango Futomaki and the Mexicali Uramaki

This is a fairly simple preparation that involves making a thumb-sized oblong portion of rice and slapping a piece of raw fish on top. I wanted to kick it up a bit and I slathered my chipotle mayo over the bottom side of the fish and then placed it on the rice. I had a beautiful portion of sushi-grade Ahi tuna, some smoked salmon (smoked locally in Maine of course!) , and some fresh jumbo shrimp.

The Nigiri

So here we are, two plates of delicious Italian-Mexican-Japanese inspired sushi! Grab an Asahi or some Saki and Kanpai!!!

Integrale Sushi Rice

  • 1 cup of Integrale Rice
  • 1/2 cup of rice vinegar
  • 1/2 tsp kosher salt
  • 1/2 tsp organic sugar
  • 2 cups of water
  1. Place the rice in a large glass bowl and rinse the rice with cold water for 10 minutes or until the water become clear and no longer cloudy. You are rinsing all the starch from rice.
  2. Soak the rice in cold water for at least 1 hour.
  3. Dump the rice into a fine mesh sieve and allow to drain for at least 30 minutes.
  4. Place into a rice cooker and add the 2 cups of water.
  5. Set cooker to Cook and let it go!
  6. Once the switch resets to warm, allow the rice to steam for about 15 minutes.
  7. Remove the rice, using a wooden spoon, to a non-reactive bowl to season the rice.
  8. Place the rice vinegar, salt, and sugar in a cup and put in microwave for 15 seconds. We just want to dissolve the salt and sugar to make a solution.
  9. Now season the rice with vinegar solution.
  10. Allow the rice to cool to room temperature.

Chilango Roll

  • 3/4 cup sushi rice.
  • 1 nori sheets
  • Carrot
  • Cucumber
  • Jalepeno
  • Chipotle Mayo
  1. Take a nori sheet. Place it on the mat, with the shiny side facing down.
  2. Grab a handful of prepared sushi rice, and spread it gently over the nori – about 1cm high. There’s no need to press the rice onto the nori, only spread it.
  3. Line up the cucumber, carrot, jalepeño on the roll.
  4. Spread a bit of the chipotle mayo on the vegetables.
  5. Roll.
  6. Cut into 8 equal pieces. For best results first cut in half, then cut each half into two, and then again.
  7. Best served with soy sauce, pickled ginger (gari) and wasabi.

Chilango Roll and Mexicali Roll

Mexicali Roll

  • 3/4 cup sushi rice.
  • 1 nori sheets
  • Smoked Salmon
  • Green Onion
  • Avocado
  • Cream Cheese
  • Cilantro
  • Black and white sesame seeds
  1. Wrap your bamboo mat with plastic wrap. This is necessary in order to prevent rice from sticking to the mat.
  2. Take a nori sheet, and break it in half. Place one half on the mat, with the shiny side facing down.
  3. Grab a handful of prepared sushi rice, and spread it gently over the nori – about 1cm high. There’s no need to press the rice onto the nori, only spread it.
  4. Sprinkle a spoonful of black and white sesame seeds evenly over the rice.
  5. Flip the nori so that the rice is now facing down.
  6. Line up the green onion, smoked salmon, avocado, cilantro and some cream cheese on the roll.
  7. Roll.
  8. Cut into 8 equal pieces. For best results first cut in half, then cut each half into two, and then again.

Sushito Integrale

Ensalada de Nopales

20 Jun

Watch my video debut with the Taste of The Times where I make Ensalada de Nopales,  MexItaliano style!


Look for another great video for Risotto Milanese Mexicana,  next Wednesday at Taste of The Times!

Ensalada de Nopales

  • 6-8 Cactus Paddles (Nopal)
  • 1/2 Red Onion
  • 6-7 Cherry Tomatoes
  • 1/2 cup cilantro leaves, packed
  • 1-2 Chile Jalapeño or Fresno chiles
  • 1/4 cup Queso cotija or Queso Fresco
  • 2 cups fresh baby arugula
  • 1/2 ripe avocado sliced.
  • 1 tablespoon Extra Virgin Olive Oil
  • 1 tablespoon White Basalmic Vinegar
  • Salt and pepper to taste

  1. Clean the nopal to remove all the needles and nubs on each paddle.
  2. Julienne each nopal into small strips about 2 inches long.
  3. Rinse and then blanch the nopales in boiling, lightly salted water for about 5 minutes.
  4. Rinse the nopal with cold water or shock on ice bath.
  5. Slice the onion, halve the cherry tomatoes, and chop the cilantro. Combine with the nopales in a mixing bowl.
  6. Stem, devein, and remove the seeds from the chiles and dice then add them to the bowl.
  7. Season with salt and pepper. Dress with the olive oil and vinegar and mix well.
  8. Wash and spin the arugula, then place on serving dish or bowl as a bed for the salad.
  9. Empty contents of mixing bowl on top of the arugula. Sprinkle with the crumbled cotija, top with the avocado slices and serve!


Integrale Milanese “Mexicana”

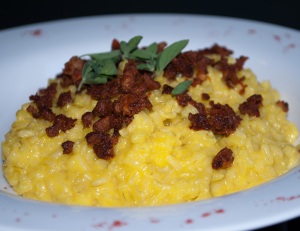
25 May Integrale Milanese "Mexicana"

For those of you who read my blog, you know that one of my all-time favorite ingredients is saffron. This delicious, but expensive, spice has a unique one-two culinary punch. It has a wonderful hay-like, flowery-honey flavor when used correctly, and it brings a very unique yellow color to whatever it’s cooked with.  I use it whenever I get the chance to use it in rice, chicken, or seafood dishes. Shortly after I won the 4thAnnual Marx Foods Morel Blogger Recipe Challenge, I jumped at the chance to enter another Marx Foods challenge, the Marx Foods Integrale Gauntlet. The Gauntlet is a 3 round challenge with the star being Integrale Rice!

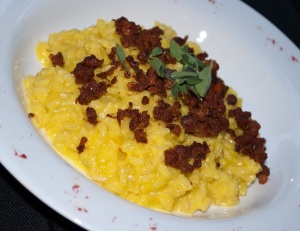
Integrale Milanese "Mexicana"

Integrale Milanese “Mexicana”

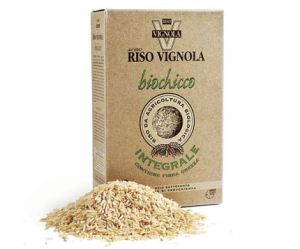
Integrale rice is an Italian brown rice that is  really not a separate variety of risotto rice, but rather a way of processing the grain so that the rice maintains its raw fiber shell, vitamin B1, B5, B6, proteins and minerals. It is incredibly healthy and only grown and harvested by organic means.

Integrale Rice

Integrale Rice

It has a slightly nutty taste and a firmer texture that enhances the “bite” of your risotto! Since this is a contest sponsored by Marx Foods, they kindly sent out 1 kilo of this amazing Integrale rice to use in my recipe!

When I approached the planning of  my dish for the contest, I knew that I wanted to use saffron, I really thought that it would complement the nutty flavor of the brown rice, but I wanted to add my own twist, using the Mexican flavors that I love as well.  In my mind, I had visions of two different dishes, Risotto Milanese and Paella. Risotto Milanese being a classically rich risotto, made with bone marrow, Parmesan cheese, and of course saffron; and Paella Valencia, the mother of all rice dishes in Spain, made with Spanish Chorizo, seafood, chicken, roasted red peppers, paprika, and finally, of course, the saffron. So, doing a bit of simulation in my head (as all engineers do from time to time), I  would use the basic concept of Risotto Milanese and add tequila in place of the white wine, and mix in a bit of the essence of Paella Valencia, somewhat deconstructed, using fresh Mexican chorizo instead of the Spanish chorizo. So what place does Tequila have in a risotto you may ask? I believe that alcohol  opens up the rice and prepares it to absorb the liquids introduced into the risotto. So why not use Tequila, and using Añejo Tequila would give the risotto another unique dimension of sweet,  “oak-y-ness” flavor once the harsh alcohol cooks off.  I would finish off the risotto with a mantecatura of butter and Manchego cheese. Manchego differs from Parmigiano-Reggiano in that it is made from sheep’s milk rather than cow’s milk. The cheese has a well developed, creamy flavor, with a distinctive, but not t0o overwhelming tangy aftertaste that is characteristic of sheep’s milk. It is the mother of all Spanish cheeses, it just sings “Marry me” to the saffron!

So I set about making the chorizo fresh on Monday night. I have a standard recipe that I learned some time ago in Mexico. I also prepared my chicken stock on Monday as well.  Having given some time for the chorizo to “cure” a few days to enhance its flavors, it was time to get dirty and get to the challenge! Risotto, once the technique is mastered, is a wonderful way to start a meal, or a stunning side to accompany any protein. Just a sidebar on Integrale rice. It is a slightly different beast, because of the raw grain shell. It takes a bit more stock and a bit more time to cook. I had to use about a cup more stock and I added about 10 minutes of cooking time to get it perfectly al dente. With some constant attention, a bit of pampering, and a shot or two of Don Julio, in about 30 minutes you have a deliciously rich risotto that will be sure to bless any table! Now I call on everyone to support us and go out and vote for this dish on May 30th!

Integrale Milanese "Mexicana"

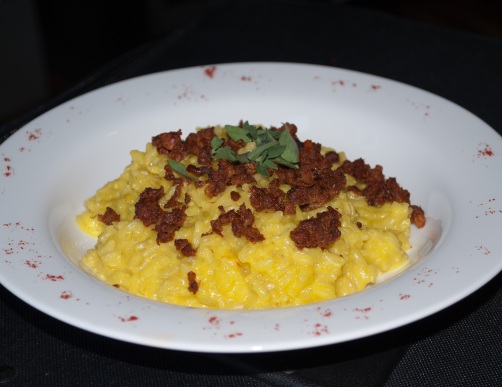
Integrale Milanese “Mexicana”


Integrale Milanese “Mexicana”

  • 1 ½ cups of Integrale Rice
  • 1 clove garlic
  • 1/2  medium yellow onion
  • 1/3 cup Tequila Añejo
  • 2 tablespoons unsalted butter
  • 2 tablespoons extra vigin olive oil
  • ½ teaspoon saffon
  • 1 teaspoon salt
  • ½ lb. Mexican Chorizo
  • ¼ cup Manchego Cheese
  • 5 cups Chicken Broth
  1. Place the 5 cups of broth  in a saucepan and bring to a simmer.
  2. Add the saffron to the broth and keep very warm.
  3. Meanwhile, take the chorizo and heat over medium heat and cook for about 10 minutes, breaking it up with a wooden spoon as it cooks.
  4. Place 2 tablespoons of the olive oil in a large sauté pan over medium-high heat.
  5. Once it is hot, add the onion and garlic and cook until translucent, but not browning!
  6. Add the rice and stir with your Girariso to combine.
  7. Add the Tequila and cook until it is completely absorbed.
  8. Start adding the stock about 1 cup at a time and stirring constantly until each cup of stock is completely absorbed before adding the next. After 4 cups of stock have been added, start tasting the rice (or about 20 minutes)
  9. When the rice is al dente, remove from heat and add the remaining 2 tablespoons of butter and the cheese and stir vigorously.
  10. Plate the risotto and sprinkle with the chorizo. Garnish with fresh parsley or fresh oregano.
  11. SERVE IMMEDIATELY!
Integrale Milanese "Mexicana"

Integrale Milanese “Mexicana”

Flan Napolitano

2 Apr Flan Napolitano

In the center of Mexico City, not far from where the Aztec main temple, Templo Mayor, once stood, there is the famous restaurant, El Cardenal. El Cardenal is an elegant place with white table cloths, white coated staff, and wonderfully delicious traditional Mexican cuisine. We go to this restaurant each and every time we are in Mexico City, primarily because they have the most decadent desserts to be found anywhere in Mexico. Among my favorites is Flan Napolitano, a delicious creamy custard covered in a sugary caramel, it is one of Mexico’s most famous desserts!

Flan Napolitano

Flan Napolitano

Flan has a long and glorious history that reaches back as far as Ancient Rome. When the Roman Empire collapsed, the custard recipe they developed became popular throughout medieval Europe.  As the recipe was replicated and adapted, it became more and more sweet. In Latin, the dessert was known as flado, for custard, it is from the French that it eventually became Flan.

In Mexico, flan was taken to a whole new level. Traditional flan is made with eggs, cane sugar, vanilla,  and cream.  It is prepared by first making sugar syrup cooked to a caramel, poured into a mold, or in my case, small soufflé molds, then finally adding the custard. It is cooked in the oven in a water bath to prevent the custard from curdling and to keep the top of the custard moist. Flan Napolitano is a bit different, in that it is made by adding cream cheese and queso doble creama to the custard. This gives the flan a much more rich and creamy texture. Flan is perfect for cooling the palatte after a spicy, chile based dish, this is why it is so popular in Mexico. There are other flavors as well; pumpkin, almond, and even coconut. But my favorite is still the classic vanilla.

In my interpretation, I decided to try to use marscapone instead of queso doble creama. The result was simply MexItaliano!

Right from the oven

Fresh from the oven taking a little bath!


Flan Napolitano MexiItaliano

Ingredients:

  • 2 cups sugar
  • 2 tablespoons water
  • 14 ounces (1 can) sweetened condensed milk
  • 1 12-ounce can evaporated milk
  • 9 ounces cream cheese
  • 9 ounces Mascarpone Cheese
  • 10 eggs
  • 1/2 of a vanilla bean
  • Pinch of salt

Directions:

For the caramel:

  1. Combine 1 cup sugar with the a bit of water in a saucepan and place over medium-high heat.
  2. When the sugar begins to melt, swirl the pan over the heat for 10 minutes, until it darkens to a honey-amber color.
  3. Remove from heat and immediately pour into each flan mold, tilting it so the caramel evenly coats the bottom.
  4. Place the molds in a large roasting pan and set aside.

    Making the caramel

    Making the caramel

For the flan:

  1. Preheat oven to 325 degrees.
  2. Bring about 4 cups of water to a simmer and keep it hot. You’ll use this for your water bath.
  3. You will need to slice the vanilla bean down the sides and remove the inner seeds, to do this take a pairing knife and slice it lengthwise, open it up and scoop out the inner seeds and place it in the bowl.
  4. Combine  the condensed milk, evaporated milk, cream cheese, crema and vanilla in a saucepan and place over medium-low heat.
  5. Bring to a simmer, stirring occasionally, but don’t allow it to come to a full boil, once it is throughly combined into a cream, remove from heat.
  6. Whisk together the eggs and remaining 1 cup sugar in a large bowl, add a pinch of salt. Whisk vigorously until thick and pale yellow in color.
  7. Now, GRADUALLY whisk the cream into the egg mixture, but be careful not to add it too quickly or the eggs will cook (What I do is combine the cream and the eggs together a ladle at a time)
  8.  Pour the custard into the caramel-coated flan molds.
  9. Carefully pour the hot water from the kettle into a roasting pan so that it’s about halfway up the side of the molds. 
  10. Transfer to the middle rack of the oven. Bake for 30-35 minutes.
  11. If you notice during this time that the surface is starting to turn golden-brown but it’s not fully cooked yet, cover it with foil so it doesn’t burn.
  12. You may also periodically insert a knife into the center of the flan to check for doneness. When the knife come out clean, it’s done; when the custard is just set and slightly jiggles, it’s time to take it out.
  13. Let custard cool completely in the water bath. Refrigerate for 2 hours.
  14. To serve, run a knife around the inside of the mold to loosen the flan. Place a serving plate over the mold and invert it to pop the flan out

    Flan Napolitano

    Flan Napolitano

Cilantro Pesto Crusted Turkey Tenderloins

8 Feb
Turkey Tenderloins

Cilantro Pesto Cruster Turkey Tenderloins

This recipe evolved from the simple boredom of having the same meal once a week. Normally, with turkey tenderloins, I simply pound them flat, give them a quick soak in some sort of marinade, and throw them on the grill.  This go around, I wanted to do something different and a bit more flavorful. Looking through a list of recipes, I was intrigued by one recipe that I found that encrusted the tenderloins in a sage pesto using walnuts. Inspired  by this recipe I decided to put my own MexItalian spin on it!

I have taken turkey tenderloins and baked them with a coating of cilantro pesto. I just love how the fresh, almost floral flavors of the cilantro combine with the garlic and citrus to add complexity to the turkey. The pesto also gives the added benefit of keeping the turkey moist during the roasting process. This recipe is kid tested and approved! My daughter, on first sight, did not want anything to do with green colored turkey. Upon tasting it, she proudly exclaimed “Whoa!”… That sure sounded like a seal of approval!

Cilantro Pesto Crusted Turkey Tenderloins

  • 2 turkey tenderloins, about 1 pound each
  • 8 medium red potatoes, quartered
  • 1/2 of a white onion, sliced
  • 1 clove of garlic, minced
  • 8-10 nopales paddles, cleaned and diced (optional but recommended!)
  • 1 tablespoon extra virgin olive oil
  • Salt
  • Fresh Cracked Black Pepper
  1. Preheat oven to 400F.
  2. In a mixing bowl combine the potatoes, onion, garlic, nopales, and olive oil. Add salt and pepper to taste and mix well.
  3. Prepare the cilantro pesto (Follow the recipe for the cilantro pesto below!).
  4. Spread the pesto all over the tenderloins and place in a roasting pan.
  5. Spread the potatoes, nopales, and onions in the same pan around the turkey.
  6. Roast for 40 minutes, or until the tenderloins reach a internal temperature of 165F. Let the tenderloins rest for 5-10 minutes prior to serving. Serve with the potatoes and nopales and a glass of Pinot Noir!

Cilantro Pesto

  • 1 bunch or 2 cups of fresh cilantro (washed well and dried well!)
  • 1/3  cup pine nuts
  • 2 cloves of garlic
  • 1/4 cup crumbled cotija cheese
  • juice of 1 lime
  • 1/2 cup extra virgin olive oil
  1. Put the pine nuts and the garlic in a food processor and pulse a few times.
  2. Add the cilantro, lime juice and slowly add the olive oil in a constant stream while the food processor is on. Stop to scrape down the sides of the food processor with a rubber spatula. Add the cotija cheese and pulse again until blended. Add a pinch of salt and freshly ground black pepper to taste.


Requesón and Cilantro Ravioli

31 Jan

Stuffed pastas have been with us since they were brought from northern Italy in medieval times. In the book, The Geometry of Pasta by Jacob Kenedy and Caz Hildebrand, it is written that there are numerous claims and legends to the invention of Ravioli. It is claimed that they developed from manti under Arab influence from the invasion of Sicily in the 1100’s. Genoa holds a claim, insisting that the name derives from the word rabilole, or “thing of little value”, which refered to the meals of the sailors, who turned scraps of leftovers into an entire meal of pasta. It is also said that the name could also derive from the word rabbiola, or “root vegetable”, ricotta and vegetable dumplings wrapped in turnips tops. With the most likely scenario being simply from the Italian avvolgere, or “to wrap”. Wherever their origin, there is little argument in the fact that the ravioli has taken its place as the undisputed king of Italian stuffed pastas.

Requeson and Cilantro Ravioli in a Tomato Poblano Sauce

Those of you that have read my About page know that the very first memory that I have actually helping my father in the kitchen was with making the ravioli on New Years morning. Ravioli was our  traditional New Years dish, and we had gluttonous eating contests every year to find who could eat the most ravioli. Our ravioli were not your typical ravioli, they seemed to be at least twice the size of normal ravioli, filled with ground beef, ground pork, ground veal, spinach, ricotta, romano and parmesan cheese. They were atomic weapons to your midsection, but my God, were they delicious!

My MexItalian spin on my fathers ravioli is not quite as nuclear, but I have incorporated some flavors of my past with some flavors of my present to bring what I think is a lighter, more interesting version of classic Italian ravioli! The pasta dough, for those with food allergies, is egg-free, as is the filling. The filling, which was inspired by Rick Bayless’s Ricotta-Stuffed Ancho Chiles with Red Wine Escabeche, uses requesón, which is a latin version of ricotta cheese, you can either make it at home in your kitchen, or you can cheat like me and buy a deli-fresh ricotta, do not substitute with the store-bought ricotta.  The effort involved with this dish is a bit intensive, but the finished product is so delicious that you will easily forget! Buen Provecho!

Requeson and Cilantro Ravioli in a Butter and Garlic Sauce

Requeson and Cilantro Ravioli in a Butter and Garlic Sauce

Requesón and Cilantro Ravioli

Pasta Dough

  • 1 cup Semolina
  • 1 cup Unbleached All-Purpose Flour
  • 2/3 cup warm water

Filling

  • 1 cup fresh cilantro (loosely packed)
  • 3 garlic cloves
  • ¼ cup grated Parmigiano Reggiano
  • 16 oz. Fresh Requeson or Ricotta Cheese
  • 1 teaspoon Cracked Black Pepper
  • Salt  to taste
  1. Roast the garlic cloves on a comal or iron skillet until nice and soft, once they are cool, peel and mash in a bowl with a fork.
  2. Wash and dry the cilantro, be sure to dry very well, as you do not want to add any liquid to the filling, then chop the cilantro.
  3. Let the Requeson or ricotta drain in a colander or sieve for about 10-15 minutes.
  4. Combine the garlic, ricotta, cilantro, and Parmigiano Reggiano cheese in a mixing bowl and mix well, season with the salt and pepper.
  5. Cover and place in fridge to chill.
  6. Combine the two flours and sift together to combine.
  7. Mound the flour in the center of the countertop or a large wooden cutting board.
  8. Make a well in the center of the flour (I make a volcano!)
  9. Add a little water at a time, stirring with your hands until you form the dough.
  10. As you continue to add water, be sure to keep the volcano shape by pushing the flour up along the sides as well.
  11. Keep adding the water until you have a shaggy mass. At this point, more than half of your flour should be incorporated. The dough should feel elastic and just a bit sticky.
  12. I add a bit more water and then start kneading using the palm of your hands.
  13. Once the dough is one mass, continue kneading for about 5 minutes. Keep dusting with flour if necessary.
  14. Wrap with plastic wrap and let it rest for about 10 minutes.
  15. Attach the pasta roller to your Kitchen Aid mixer and put it on the widest setting (1).
  16. After the dough has rested, cut in half and form a small rectangle about 1 inch thick.
  17. Put the mixer speed on 2 and feed the dough through the roller. Each time dusting a bit with flour and folding to get the best separation. I usually need to feed it through at this setting about 5 or 6 times, each time dusting and folding.
  18. Continue and feed the sheet through each setting until you get to setting 5, at this time you have the proper thickness for the sheet.
  19. I usually cut the sheet into a length no larger than the width of my countertop, so cut the sheet after about 1 meter portions.

    Pasta Sheets

    Each Sheet of Pasta is about 1 Meter in Length

  20. Continue this process with the rest of the dough.
  21. Starting with one sheet, brush off any flour from the top of the sheet and take your filling out of the fridge. Measure one scant tablespoon of filling and place it along the center of the sheet about every 6 inches. Continue placing a tablespoon every six inches until you get to the end of the sheet. You want enough filling in each ravioli to have a nice shape, but not so much that you will have trouble sealing the edges of the pasta.

    Ravioli Filling

    Filling on the bottom sheet

  22. Mist with some water for adhesion.
  23. Place another sheet over the top and slightly flatten each pocket of filling, then start with gentle pressure to press out any air and to form a seal around and between each pocket of filling.
  24. Once all the air pockets have been removed and each pocket of filling is nicely formed, you can cut each ravioli using a cookie cutter, a pastry roller, or a ravioli cutter.
  25. Place the ravioli in a single layer on a cookie sheet dusted with semolina. At this point, if you want to freeze the ravioli for later, place the entire cookie sheet into the freezer. Once the ravioli has frozen, you can remove the pasta and put them into bags.

    Ravioli

    Ravioli made and ready to cook!

Tomato Poblano Sauce

  • 5 medium vine ripe tomatoes
  • 3 cloves garlic
  • 5 tablespoons olive oil
  • 1 teaspoon crushed red pepper
  • 2 chile poblanos
  • Salt and pepper to taste
  1. Roast the poblanos over a open flame or in the oven, then remove the stems, seeds, and veins and place in a blender.
  2. Quarter the tomatoes and place in the blender.
  3. Puree the tomatoes and poblanos.
  4. Put 3 tablespoons of the olive oil into a saucepan over medium-high heat. Crush the garlic with the back of a knife and fry with the red pepper until it just begins to color.
  5. Remove the garlic and pour the contents of the blender and quickly fry for about a minute.
  6. Lower the heat to medium-low and continue to cook for about 20 minutes or until the water is slightly reduced and the tomatoes no longer have that “raw” taste.
  7. Apply a liberal amount of salt and pepper to season, and finish with the rest of the olive oil.

    Requeson and Cilantro Ravioli

    Requeson and Cilantro Ravioli in a Tomato Poblano Sauce