Archive | Italian Food RSS feed for this section

Sushito Integrale

24 Jun

It’s the Final Round of the Marx Foods Integrale Gauntlet! My final entry not only fuses the great Italian Integrale rice with some of the flavors of Mexico, but I also have found a way to add the cuisine of another of my favorite countries, Japan! Yes, that’s right folks, I present to you Mexican Sushi made with Italian Integrale rice! I really wanted to show everyone the versatility of this great product, and I think with the three entries I have made for the Integrale Gauntlet, from a risotto, to a rice pudding, and now sushi, I have really given this Italian short grain

Sushito Integrale

One may ask the question, What is Mexican Sushi? Well, it is not much different from the classic Japanese sushi that we all know and love. It just simply utilizes some Mexican flavors to kick up the volume. We replace the wasabi placed under the nigiri (a slice of raw fish on a thumb sized chunk of rice) with chipotle,  add in a little jalapeno in our futomaki ( or “fat” roll) , some ripe avocado,  toss in a little cilantro and we have our Mexican Sushi!

One of the challenges of making this dish was trying to get the Integrale rice to play the role of the classic Japanese sushi rice. I found that you need to tweek two parts in the process. I found that you needed to soak the rice for a extended period of time before cooking. I also needed to decrease the amount of water used in the preparation of the rice or else the rice becomes too much like dough.

Once I had cooked and seasoned my rice, I wanted to make two different types of rolls for my entry. I wanted to make the classic Futomaki, a seaweed encased sushi roll filled with cucumber, carrot,  jalepeño, and a hint of my chipotle mayo.  I call this the “Chilango” roll, a complete vegan roll inspired by the chic urban youth of Mexico City.  Next on my list was the “Mexicali’ roll. This is a Uramaki, or an inside-out roll. This type of roll is a bit more challenging because you have to flip the nori (the seaweed) over once the rice is spread out. For this roll I wanted to meld the flavors of smoked salmon, green onion, cream cheese, cilantro, and finally some avocado.  Now there was one more roll I wanted to make, but my rice supply was dwindling, so I set to making the Nigiri.

Chilango Futomaki and the Mexicali Uramaki

This is a fairly simple preparation that involves making a thumb-sized oblong portion of rice and slapping a piece of raw fish on top. I wanted to kick it up a bit and I slathered my chipotle mayo over the bottom side of the fish and then placed it on the rice. I had a beautiful portion of sushi-grade Ahi tuna, some smoked salmon (smoked locally in Maine of course!) , and some fresh jumbo shrimp.

The Nigiri

So here we are, two plates of delicious Italian-Mexican-Japanese inspired sushi! Grab an Asahi or some Saki and Kanpai!!!

Integrale Sushi Rice

  • 1 cup of Integrale Rice
  • 1/2 cup of rice vinegar
  • 1/2 tsp kosher salt
  • 1/2 tsp organic sugar
  • 2 cups of water
  1. Place the rice in a large glass bowl and rinse the rice with cold water for 10 minutes or until the water become clear and no longer cloudy. You are rinsing all the starch from rice.
  2. Soak the rice in cold water for at least 1 hour.
  3. Dump the rice into a fine mesh sieve and allow to drain for at least 30 minutes.
  4. Place into a rice cooker and add the 2 cups of water.
  5. Set cooker to Cook and let it go!
  6. Once the switch resets to warm, allow the rice to steam for about 15 minutes.
  7. Remove the rice, using a wooden spoon, to a non-reactive bowl to season the rice.
  8. Place the rice vinegar, salt, and sugar in a cup and put in microwave for 15 seconds. We just want to dissolve the salt and sugar to make a solution.
  9. Now season the rice with vinegar solution.
  10. Allow the rice to cool to room temperature.

Chilango Roll

  • 3/4 cup sushi rice.
  • 1 nori sheets
  • Carrot
  • Cucumber
  • Jalepeno
  • Chipotle Mayo
  1. Take a nori sheet. Place it on the mat, with the shiny side facing down.
  2. Grab a handful of prepared sushi rice, and spread it gently over the nori – about 1cm high. There’s no need to press the rice onto the nori, only spread it.
  3. Line up the cucumber, carrot, jalepeño on the roll.
  4. Spread a bit of the chipotle mayo on the vegetables.
  5. Roll.
  6. Cut into 8 equal pieces. For best results first cut in half, then cut each half into two, and then again.
  7. Best served with soy sauce, pickled ginger (gari) and wasabi.

Chilango Roll and Mexicali Roll

Mexicali Roll

  • 3/4 cup sushi rice.
  • 1 nori sheets
  • Smoked Salmon
  • Green Onion
  • Avocado
  • Cream Cheese
  • Cilantro
  • Black and white sesame seeds
  1. Wrap your bamboo mat with plastic wrap. This is necessary in order to prevent rice from sticking to the mat.
  2. Take a nori sheet, and break it in half. Place one half on the mat, with the shiny side facing down.
  3. Grab a handful of prepared sushi rice, and spread it gently over the nori – about 1cm high. There’s no need to press the rice onto the nori, only spread it.
  4. Sprinkle a spoonful of black and white sesame seeds evenly over the rice.
  5. Flip the nori so that the rice is now facing down.
  6. Line up the green onion, smoked salmon, avocado, cilantro and some cream cheese on the roll.
  7. Roll.
  8. Cut into 8 equal pieces. For best results first cut in half, then cut each half into two, and then again.

Sushito Integrale

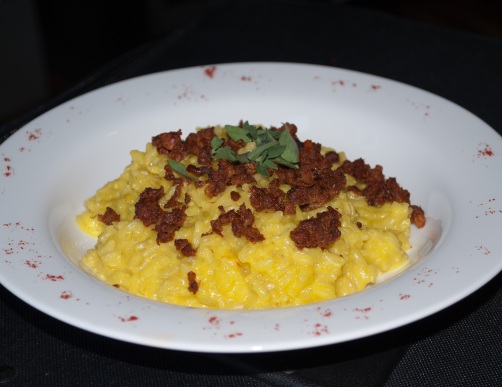
Integrale Milanese “Mexicana”

25 May Integrale Milanese "Mexicana"

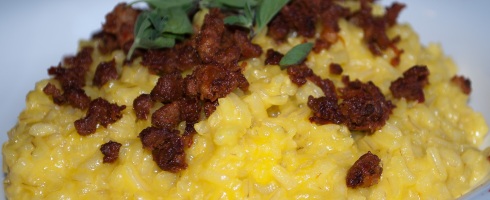
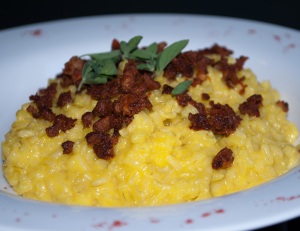
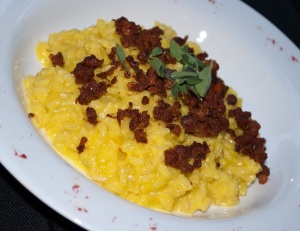
For those of you who read my blog, you know that one of my all-time favorite ingredients is saffron. This delicious, but expensive, spice has a unique one-two culinary punch. It has a wonderful hay-like, flowery-honey flavor when used correctly, and it brings a very unique yellow color to whatever it’s cooked with.  I use it whenever I get the chance to use it in rice, chicken, or seafood dishes. Shortly after I won the 4thAnnual Marx Foods Morel Blogger Recipe Challenge, I jumped at the chance to enter another Marx Foods challenge, the Marx Foods Integrale Gauntlet. The Gauntlet is a 3 round challenge with the star being Integrale Rice!

Integrale Milanese "Mexicana"

Integrale Milanese “Mexicana”

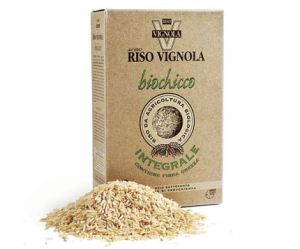
Integrale rice is an Italian brown rice that is  really not a separate variety of risotto rice, but rather a way of processing the grain so that the rice maintains its raw fiber shell, vitamin B1, B5, B6, proteins and minerals. It is incredibly healthy and only grown and harvested by organic means.

Integrale Rice

Integrale Rice

It has a slightly nutty taste and a firmer texture that enhances the “bite” of your risotto! Since this is a contest sponsored by Marx Foods, they kindly sent out 1 kilo of this amazing Integrale rice to use in my recipe!

When I approached the planning of  my dish for the contest, I knew that I wanted to use saffron, I really thought that it would complement the nutty flavor of the brown rice, but I wanted to add my own twist, using the Mexican flavors that I love as well.  In my mind, I had visions of two different dishes, Risotto Milanese and Paella. Risotto Milanese being a classically rich risotto, made with bone marrow, Parmesan cheese, and of course saffron; and Paella Valencia, the mother of all rice dishes in Spain, made with Spanish Chorizo, seafood, chicken, roasted red peppers, paprika, and finally, of course, the saffron. So, doing a bit of simulation in my head (as all engineers do from time to time), I  would use the basic concept of Risotto Milanese and add tequila in place of the white wine, and mix in a bit of the essence of Paella Valencia, somewhat deconstructed, using fresh Mexican chorizo instead of the Spanish chorizo. So what place does Tequila have in a risotto you may ask? I believe that alcohol  opens up the rice and prepares it to absorb the liquids introduced into the risotto. So why not use Tequila, and using Añejo Tequila would give the risotto another unique dimension of sweet,  “oak-y-ness” flavor once the harsh alcohol cooks off.  I would finish off the risotto with a mantecatura of butter and Manchego cheese. Manchego differs from Parmigiano-Reggiano in that it is made from sheep’s milk rather than cow’s milk. The cheese has a well developed, creamy flavor, with a distinctive, but not t0o overwhelming tangy aftertaste that is characteristic of sheep’s milk. It is the mother of all Spanish cheeses, it just sings “Marry me” to the saffron!

So I set about making the chorizo fresh on Monday night. I have a standard recipe that I learned some time ago in Mexico. I also prepared my chicken stock on Monday as well.  Having given some time for the chorizo to “cure” a few days to enhance its flavors, it was time to get dirty and get to the challenge! Risotto, once the technique is mastered, is a wonderful way to start a meal, or a stunning side to accompany any protein. Just a sidebar on Integrale rice. It is a slightly different beast, because of the raw grain shell. It takes a bit more stock and a bit more time to cook. I had to use about a cup more stock and I added about 10 minutes of cooking time to get it perfectly al dente. With some constant attention, a bit of pampering, and a shot or two of Don Julio, in about 30 minutes you have a deliciously rich risotto that will be sure to bless any table! Now I call on everyone to support us and go out and vote for this dish on May 30th!

Integrale Milanese "Mexicana"

Integrale Milanese “Mexicana”


Integrale Milanese “Mexicana”

  • 1 ½ cups of Integrale Rice
  • 1 clove garlic
  • 1/2  medium yellow onion
  • 1/3 cup Tequila Añejo
  • 2 tablespoons unsalted butter
  • 2 tablespoons extra vigin olive oil
  • ½ teaspoon saffon
  • 1 teaspoon salt
  • ½ lb. Mexican Chorizo
  • ¼ cup Manchego Cheese
  • 5 cups Chicken Broth
  1. Place the 5 cups of broth  in a saucepan and bring to a simmer.
  2. Add the saffron to the broth and keep very warm.
  3. Meanwhile, take the chorizo and heat over medium heat and cook for about 10 minutes, breaking it up with a wooden spoon as it cooks.
  4. Place 2 tablespoons of the olive oil in a large sauté pan over medium-high heat.
  5. Once it is hot, add the onion and garlic and cook until translucent, but not browning!
  6. Add the rice and stir with your Girariso to combine.
  7. Add the Tequila and cook until it is completely absorbed.
  8. Start adding the stock about 1 cup at a time and stirring constantly until each cup of stock is completely absorbed before adding the next. After 4 cups of stock have been added, start tasting the rice (or about 20 minutes)
  9. When the rice is al dente, remove from heat and add the remaining 2 tablespoons of butter and the cheese and stir vigorously.
  10. Plate the risotto and sprinkle with the chorizo. Garnish with fresh parsley or fresh oregano.
  11. SERVE IMMEDIATELY!
Integrale Milanese "Mexicana"

Integrale Milanese “Mexicana”

Shadone – The Italian Easter “Pie”

26 Mar Easter Shadone

If you know any Italians, one thing you would be sure to remember is that we are filled with so many traditions when it comes to food. We have a dish for just about any holiday on the calendar. For my family, it is the “Seven Fishes” on Christmas Eve, the Cavatelli for Christmas Day, the Ravioli on New Years Day, and for Easter we have Shadone.

Easter Shadone

Shadone

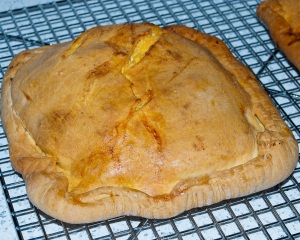
Shadone is a rather reclusive dish. If you Google it, you probably will not find much information on its source or on its history. Like all dishes in Italy, they are quite regional, so my guess is that it originated somewhere in Northern Italy, possibly the region of Liguria, as this is where eggs were used most in Italian cuisine. I would say it is more of an educated guess than fact though, so don’t hold me to that!  Those of you more familiar with the Pizzagaina, may find it to be very similar to Shadone as well. I find it to be a cross between a Quiche, a pie, and a Calzone. The star of the dish is of course, centered on the symbol of Easter, the Egg!

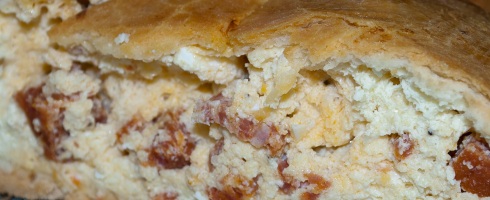
Shadone is a decadent Easter bread filled with plenty of eggs, cheeses, and pepperoni (salami). It is a bit involved to make, and it was a bit challenging for me as I have never made it before. I seemed to spend an unusual amount of time making my iPhone dirty by trying to call my father to get his tips and tricks! One of the things I loved about this was the smell. I remember smelling the aromas of the salami as it baked in the oven! There are few aromas better to my nose than pepperoni and bread baking in the oven! We generally would eat this as a starter before our Easter brunch. But it also makes a great breakfast, so grab a nice big slice and a cappuccino and enjoy! Buona Pasqua!

Shadone

Fresh from the Oven


Shadone

(The DelGrosso Italian Easter “Pie”)

Filling:

  • 1 1/4 lbs. Dried Salami, Sopresseta, or “Pepperoni”
  • 1 3/4 lbs. Ricotta Cheese
  • 1/2 lb. Queso Fresco
  • 4 Hard boiled eggs
  • 1/4 cup grated Pecorino Romano cheese
  • 5 eggs
  • Salt and Pepper to taste

Dough

  • 4 Eggs
  • 1/4 lb. Butter
  • 1 cup milk
  • 2 tsp. salt
  • 2 tsp. baking powder
  • 5 cups Unbleached All-Purpose Flour
  1. Hard boil the eggs; Place the eggs in cold water in a medium saucepan, making sure they have about 1 inch of water covering them.
  2. Put about a teaspoon of salt in the water and heat the eggs on high heat to a boil. Once it comes to a boil, turn the heat to medium and continue to boil for 1 minute.
  3. After one minute, cover, and remove from the heat. Let sit for 12 minutes. Your eggs should be perfectly hard-boiled. Set aside to cool completely.
  4. Chop the salami into small cubes, I basically julienne the salami.
  5. Peel and chop the hard-boiled eggs.
  6. In a large mixing bowl combine the pepperoni, hard-boiled eggs, the cheeses. Add the lightly beaten eggs and mix well.
  7. Add some cracked black pepper and some salt. At this point I taste for seasoning, but if you are queasy about eating raw egg, you can skip this. I added about 1 teaspoon of salt and about 1 1/2 teaspoons of black pepper.
  8. Once the filling is ready, you can cover with some plastic wrap and put it in the fridge while you work on the dough.
  9. For the dough, place the dry ingredients (flour, salt, baking powder) into your Kitchen Aid mixing bowl and use the paddle to mix for about 1 minute.
  10. At this point I placed my tiles in the oven on the bottom rack and preheated the oven to 350°F.
  11. Then detach the bowl and add the cold butter in chunks. Use a pastry blender and work the butter into the flour until the mixture becomes crumbly and you no longer pull butter out of the pastry blender.
  12. Attach the mixing bowl and switch to the dough hook.
  13. Whisk the eggs and the milk together in a separate bowl and add to the dry ingredients.
  14. Mix on low-speed for about 2 minutes.
  15. Now, I did something different here, instead of continuing to knead, I took the dough out, folded it a couple of times, then placed it back into the mixing bowl. I wanted to make sure that all the flour was incorporated into the dough.
  16. Turn the mixer back on low and knead for 8 minutes.
  17. Cover it in plastic wrap and let it rest for about 10 minutes on the counter.
  18. Now, since this was my first time making this recipe, I kind of winged the rest of this:
  19.  I took a portion of dough a bit larger than an orange, flattened it with my hands, dusted it with flour  and fed it through my Kitchen Aid pasta roller on setting #1.
  20. I dusted it again with some flour and fed it through setting #2.
  21. I cut the sheet in a length about  24 inches, lay it down on a dusted countertop or pastry board. I rolled it along its width with a rolling-pin to make it a bit thinner and open it up a bit to about 8 inches.
  22. I cut the sheet in half (One for the bottom, one for the top) and placed about 1 cup of filling in the center of the bottom sheet, spread it out a bit with your spatula, but be sure to leave about an inch all the way around the sheet for you to close it up.
  23. Now place the top half of the sheet over the bottom sheet with the filling. Cut off any excess dough to even up the edges.
  24. Fold up the edges and corners, and seal with a fork in a cross-hatch pattern all around the pie (very similar to sealing ravioli).
  25. Baste with some egg wash, but do not baste the sealed edges and corners, just the top.
  26. At this point you have an option. You can slash it a couple of times across the top, or take a toothpick and poke some holes in the top gently to allow the steam to escape. I did half one way and half the other way to see what was better, I personally like the slash method!
  27. Place on parchment paper before setting on the tiles so that you do not burn the bottoms.
  28. Bake in the oven for about 1 hour.

    Shadone

    Halfway through baking!

  29. Place the pies on a wire rack and allow to cool completely. Refrigerate or freeze what you do not eat.

    Shadone

    Shadone


Requesón and Cilantro Ravioli

31 Jan

Stuffed pastas have been with us since they were brought from northern Italy in medieval times. In the book, The Geometry of Pasta by Jacob Kenedy and Caz Hildebrand, it is written that there are numerous claims and legends to the invention of Ravioli. It is claimed that they developed from manti under Arab influence from the invasion of Sicily in the 1100’s. Genoa holds a claim, insisting that the name derives from the word rabilole, or “thing of little value”, which refered to the meals of the sailors, who turned scraps of leftovers into an entire meal of pasta. It is also said that the name could also derive from the word rabbiola, or “root vegetable”, ricotta and vegetable dumplings wrapped in turnips tops. With the most likely scenario being simply from the Italian avvolgere, or “to wrap”. Wherever their origin, there is little argument in the fact that the ravioli has taken its place as the undisputed king of Italian stuffed pastas.

Requeson and Cilantro Ravioli in a Tomato Poblano Sauce

Those of you that have read my About page know that the very first memory that I have actually helping my father in the kitchen was with making the ravioli on New Years morning. Ravioli was our  traditional New Years dish, and we had gluttonous eating contests every year to find who could eat the most ravioli. Our ravioli were not your typical ravioli, they seemed to be at least twice the size of normal ravioli, filled with ground beef, ground pork, ground veal, spinach, ricotta, romano and parmesan cheese. They were atomic weapons to your midsection, but my God, were they delicious!

My MexItalian spin on my fathers ravioli is not quite as nuclear, but I have incorporated some flavors of my past with some flavors of my present to bring what I think is a lighter, more interesting version of classic Italian ravioli! The pasta dough, for those with food allergies, is egg-free, as is the filling. The filling, which was inspired by Rick Bayless’s Ricotta-Stuffed Ancho Chiles with Red Wine Escabeche, uses requesón, which is a latin version of ricotta cheese, you can either make it at home in your kitchen, or you can cheat like me and buy a deli-fresh ricotta, do not substitute with the store-bought ricotta.  The effort involved with this dish is a bit intensive, but the finished product is so delicious that you will easily forget! Buen Provecho!

Requeson and Cilantro Ravioli in a Butter and Garlic Sauce

Requeson and Cilantro Ravioli in a Butter and Garlic Sauce

Requesón and Cilantro Ravioli

Pasta Dough

  • 1 cup Semolina
  • 1 cup Unbleached All-Purpose Flour
  • 2/3 cup warm water

Filling

  • 1 cup fresh cilantro (loosely packed)
  • 3 garlic cloves
  • ¼ cup grated Parmigiano Reggiano
  • 16 oz. Fresh Requeson or Ricotta Cheese
  • 1 teaspoon Cracked Black Pepper
  • Salt  to taste
  1. Roast the garlic cloves on a comal or iron skillet until nice and soft, once they are cool, peel and mash in a bowl with a fork.
  2. Wash and dry the cilantro, be sure to dry very well, as you do not want to add any liquid to the filling, then chop the cilantro.
  3. Let the Requeson or ricotta drain in a colander or sieve for about 10-15 minutes.
  4. Combine the garlic, ricotta, cilantro, and Parmigiano Reggiano cheese in a mixing bowl and mix well, season with the salt and pepper.
  5. Cover and place in fridge to chill.
  6. Combine the two flours and sift together to combine.
  7. Mound the flour in the center of the countertop or a large wooden cutting board.
  8. Make a well in the center of the flour (I make a volcano!)
  9. Add a little water at a time, stirring with your hands until you form the dough.
  10. As you continue to add water, be sure to keep the volcano shape by pushing the flour up along the sides as well.
  11. Keep adding the water until you have a shaggy mass. At this point, more than half of your flour should be incorporated. The dough should feel elastic and just a bit sticky.
  12. I add a bit more water and then start kneading using the palm of your hands.
  13. Once the dough is one mass, continue kneading for about 5 minutes. Keep dusting with flour if necessary.
  14. Wrap with plastic wrap and let it rest for about 10 minutes.
  15. Attach the pasta roller to your Kitchen Aid mixer and put it on the widest setting (1).
  16. After the dough has rested, cut in half and form a small rectangle about 1 inch thick.
  17. Put the mixer speed on 2 and feed the dough through the roller. Each time dusting a bit with flour and folding to get the best separation. I usually need to feed it through at this setting about 5 or 6 times, each time dusting and folding.
  18. Continue and feed the sheet through each setting until you get to setting 5, at this time you have the proper thickness for the sheet.
  19. I usually cut the sheet into a length no larger than the width of my countertop, so cut the sheet after about 1 meter portions.

    Pasta Sheets

    Each Sheet of Pasta is about 1 Meter in Length

  20. Continue this process with the rest of the dough.
  21. Starting with one sheet, brush off any flour from the top of the sheet and take your filling out of the fridge. Measure one scant tablespoon of filling and place it along the center of the sheet about every 6 inches. Continue placing a tablespoon every six inches until you get to the end of the sheet. You want enough filling in each ravioli to have a nice shape, but not so much that you will have trouble sealing the edges of the pasta.

    Ravioli Filling

    Filling on the bottom sheet

  22. Mist with some water for adhesion.
  23. Place another sheet over the top and slightly flatten each pocket of filling, then start with gentle pressure to press out any air and to form a seal around and between each pocket of filling.
  24. Once all the air pockets have been removed and each pocket of filling is nicely formed, you can cut each ravioli using a cookie cutter, a pastry roller, or a ravioli cutter.
  25. Place the ravioli in a single layer on a cookie sheet dusted with semolina. At this point, if you want to freeze the ravioli for later, place the entire cookie sheet into the freezer. Once the ravioli has frozen, you can remove the pasta and put them into bags.

    Ravioli

    Ravioli made and ready to cook!

Tomato Poblano Sauce

  • 5 medium vine ripe tomatoes
  • 3 cloves garlic
  • 5 tablespoons olive oil
  • 1 teaspoon crushed red pepper
  • 2 chile poblanos
  • Salt and pepper to taste
  1. Roast the poblanos over a open flame or in the oven, then remove the stems, seeds, and veins and place in a blender.
  2. Quarter the tomatoes and place in the blender.
  3. Puree the tomatoes and poblanos.
  4. Put 3 tablespoons of the olive oil into a saucepan over medium-high heat. Crush the garlic with the back of a knife and fry with the red pepper until it just begins to color.
  5. Remove the garlic and pour the contents of the blender and quickly fry for about a minute.
  6. Lower the heat to medium-low and continue to cook for about 20 minutes or until the water is slightly reduced and the tomatoes no longer have that “raw” taste.
  7. Apply a liberal amount of salt and pepper to season, and finish with the rest of the olive oil.

    Requeson and Cilantro Ravioli

    Requeson and Cilantro Ravioli in a Tomato Poblano Sauce

The “Little Ribbons” of Joy

19 Oct

So I went out the other weekend and bought myself the pasta attachment for my KitchenAid mixer.  My first use came with making a batch of whole wheat chipotle fettuccine.  First, allow me the indulgence of giving a little background on fettuccine; Fettuccine, literally “little ribbons” in Italian,  is a popular type of flat pasta usually made of egg and flour (some days I enjoy channeling Cliff Clavin), although my recipe is sans egg as my daughter has an egg allergy.  In my recipe, the egg is replaced by a puree of hot water and chipotle chile.

First off, it is important to form this dough correctly, so take your 2 cups of whole wheat flour and make a mound of it directly on your work surface. Now, when I was a kid, helping my father make the pasta dough, I always imagined it as a volcano, so make a large crater in the center of the mound to form your volcano. Now, go over to your blender, place the contents of one can of La Costena Chipotle Chiles (for me, there is NO substitute) into the blender and ½ cup of hot water. Put the blender on puree and let it run until it is nice and smooth. Get a medium mesh sieve out of your drawer or cabinet and press the puree through the sieve into a small bowl. Now take that bowl over to your volcano and add it to the crater. If you have not figured it out yet, this would be the lava. Finally, add about 2 tablespoon of Extra Virgin Olive Oil. Now comes the fun part!

Start pulling the flour, working it with your fingers, into the lava, incorporating a little of the flour at a time. When all the flour has been mixed in, knead the dough, pushing it down against the counter and folding it repeatedly until it is no longer sticky and quite stiff. If you think it is too dry or it is not coming together well enough, add hot water ½ of a teaspoon at a time; add more flour if it is too sticky.

Once has been thoroughly worked, sprinkle the dough with a little more flour and cover it with some plastic wrap or a clean cloth. From here we let it rest for about 30 minutes or so, usually just long enough to wash your hands, grab a glass of wine, and to listen to some salsa.  At this point, you can drink the whole bottle if you wanted to, but be sure to wrap up the dough and put it in the refrigerator first. It will hold in the fridge for up to 24 hours.
We (Me) are going to have just one glass of wine and continue on:

Pasta Sheets

The Pasta Sheets

Grab your mixer unit, install the pasta roller, and put the setting on the roller to its thickest setting (1).  Chop off about ¼ of the dough, roll it out a little bit and use your hand to form a rectangle about the width of the roller attachment and put it through the rollers, if it sticks, just dust it again with flour. Folder over the dough on itself and repeat this process again.  Set the machine to its next setting and repeat, dusting the dough as necessary to avoid it sticking. We keep working our way down through the numbered settings, putting the dough through the roller twice for each setting. If the dough tears or breaks up, start all over again.  If you are a pasta virgin, the art of pushing the dough through the rollers and catching it on the other end may take a few attempts, but you will quickly get the hang of it!  Once you have fed the dough through the roller at number 5, STOP! Your dough is now at the correct thickness for the fettuccine! Lay out the sheet on your counter top, cut the sheet into thirds or whatever length of pasta your desire, cut the width as wide as the pasta cutter attachment, sprinkle it with a little flour and admire your handiwork, then go grab another glass of wine! Once you have downed that glass of wine, go back over to your dough, grab another ¼ sized piece of dough and repeat the same process for each quarter piece of dough, skipping the wine if you want to be able to stand to use the cutter attachment!

Once all the dough has been nicely rolled into stacked sheets of pasta, they should all be ready to feed through the fettuccine cutter.  We have our sheets all ready to be cut, so what are we missing? First, remove the pasta roller attachment and attach the wide pasta cutter attachment and be sure that you have some sort of hanging apparatus to hang your pasta from once you have cut it. Maybe you have some fancy dowels or even a pasta hanging rack,  or, someone once told me, “Use-a the back-a da chair, just like-a your Gramma use to!”, it should be obvious this is a literal translation of broken English, but you get the point; pull up your chair and get to cutting, you are almost at the finish line!

Take each sheet and feed it through the pasta cutter, some hand separation may be necessary when cutting the whole wheat pasta, but if you have been sprinkling with flour as you have gone along these steps, you should be just fine. My "Little Ribbons"Once you have fed the sheets through the cutter, either form a bird’s nest and place it on a lightly floured cookie sheet, or hang the pasta on the back of your chair. If you are not going to cook this delicious pasta right away, you can either dry for a few hours and store it in an airtight container, or take the birds’ nests that you have made and place them in a large freezer bag and freeze them.

We can now take another glass of wine and celebrate this wonderful accomplishment. We have made our own fresh pasta! Once you have mastered this technique, trust me, you may never use store-bought dry pasta ever again!

By the way, continue the great MexItalian theme and serve it tossed in a fresh Cilantro Pesto!